
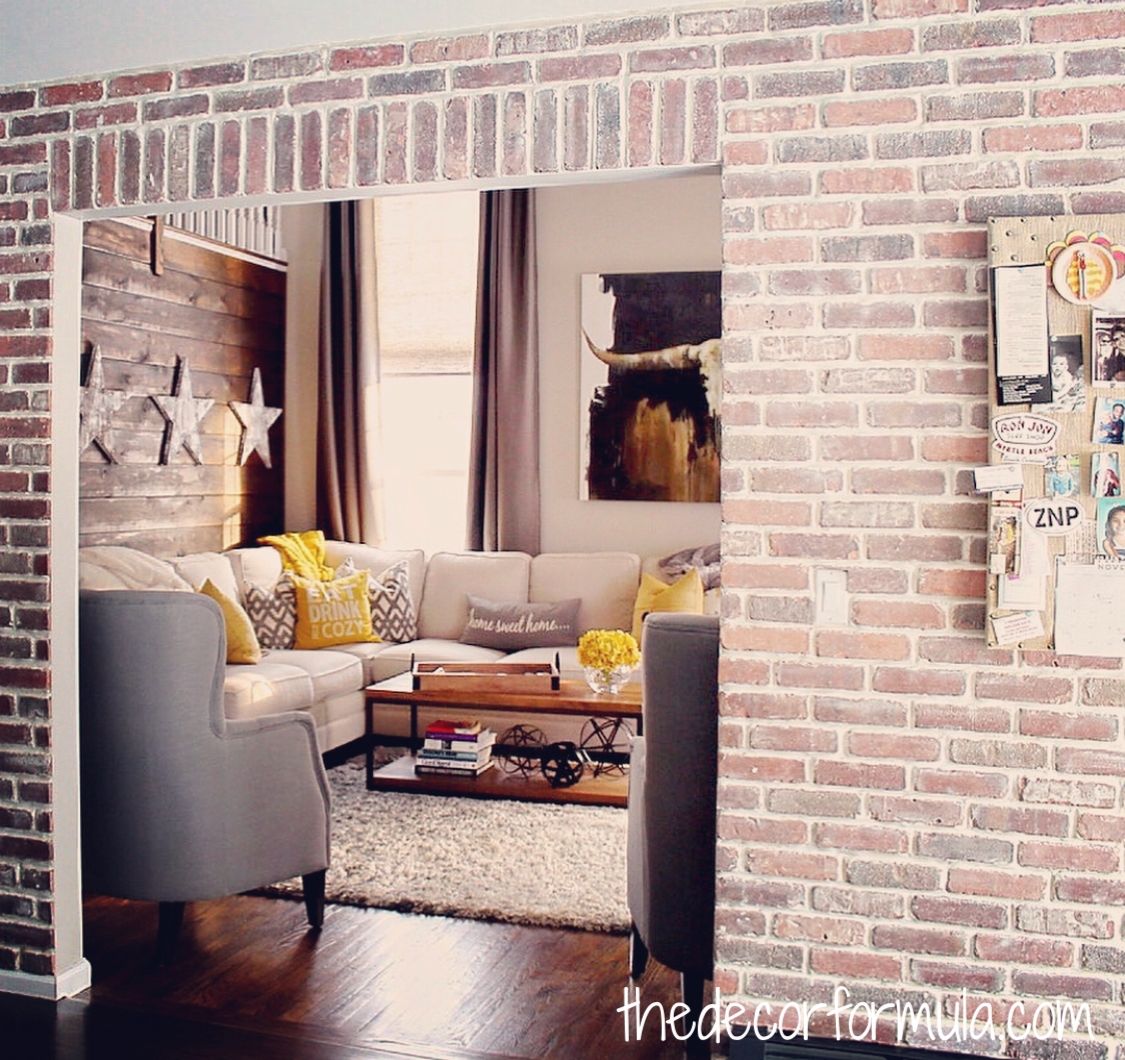
DIY Brick Wall: How to Create a "Fake" "Real" Exposed Brick Wall
Some of my greatest do-it-yourself accomplishments have come from a combination of the desire to create a certain look in my home, while having a limited budget, and limited budgets usually mean you don't have the money to pay for the labor of an outsider on certain projects.

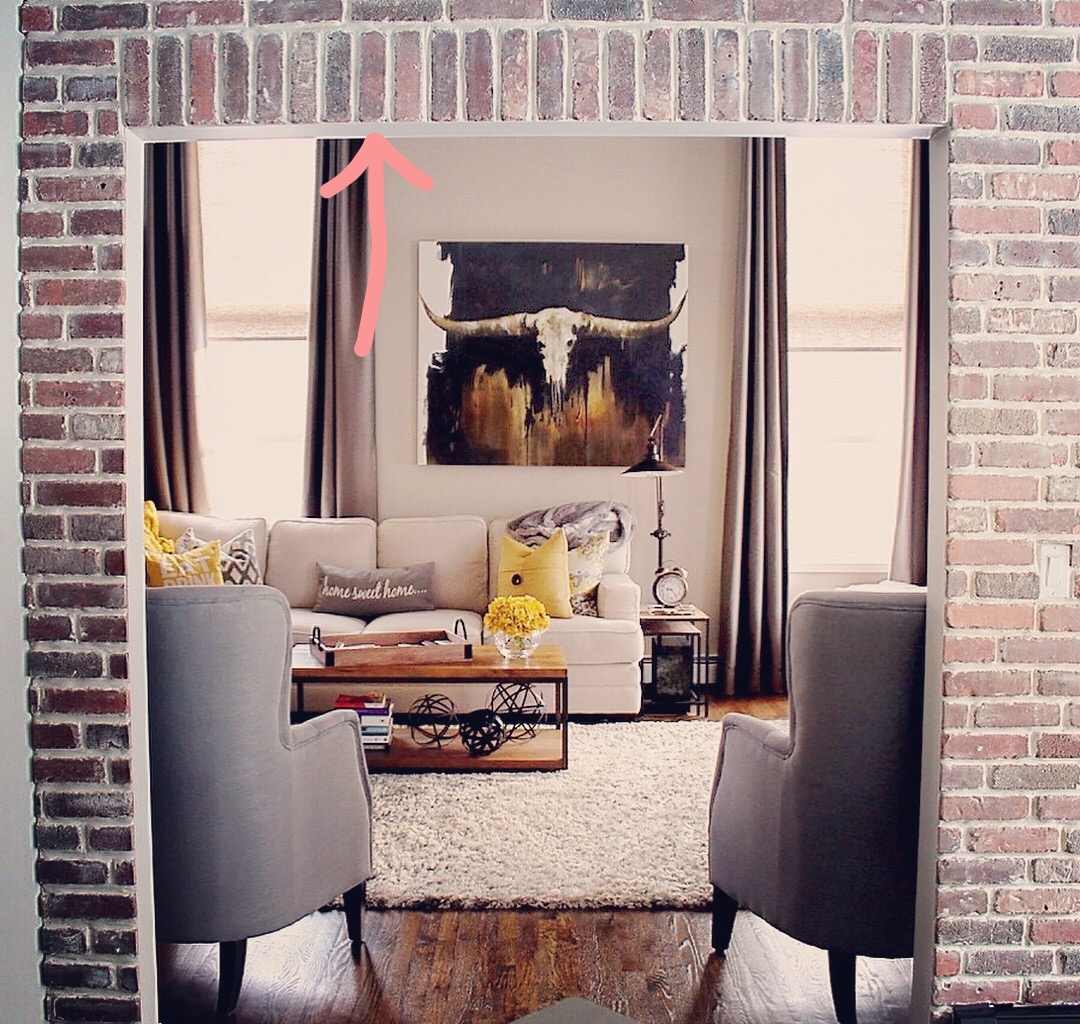
This "exposed" brick wall fit that bill.
When I began the planning and saving process for our kitchen renovation, (which was three years in the making)- there were certain projects I knew would fit the "modern farmhouse/rustic look" that Shad and I were going for, and could be completed prior to the actual renovation.
Project 1 in year 1 of saving for our renovation was our sliding barn door (see my other blog post on How to Build a Barn Door on a budget).

Project 2 in year 2 of saving was this exposed brick wall.
Project 3 just a few months prior to the start of our renovation included the building of these floating shelves.

Doing small projects along the way before the actual renovation somehow made the wait seem a lot shorter, the "saving" not as painful, and as our vision started to take shape, I became more and more excited to finally get to the big renovation.
So when it came to this brick wall: I wanted it so badly and I didn't want to pay for the labor. This combination somehow led to me feeling like I could do it- but I wasn't positive that I would be successful. Everyone I mentioned this to would say: "YOU'RE going to brick that wall? Yourself??" And if I have to be honest, the self talk in my head shuffled back and forth between, "You can totally do this!" to "You're nuts, what are you thinking?"
When I started to price this out the doubt truly started to set in. This was a huge risk to take mainly because of the cost of the "real" brick veneer was so much. In total I needed enough for 85 sq. feet (Our wall is 15 ft long by 8 ft wide minus the large 40 sq ft opening), and it cost me around $650 in brick. For anyone who knows me, I'm super frugal, but I dove into this project head first and prayed it would work out for the best. Thankfully it did.

My formula for this "exposed" brick wall is:
Spackle + Brick Veneer+ Omnigrip Adhesive + Sanded Grout + Misc. Tools listed below
Now, if only I could go back in time these past three years, I would tell my old self to take lots of before & during pictures of all the projects I've done. Unfortunately, I'm the worst at this but I am getting better. I do have an amazing memory for detail, which is needed when teaching American History is your day job. It also helps that I spent 2 days alone staring at bricks while I completed this project, so I can very vividly remember each step. So I will do my best to describe in great detail how easy this project was.... and in a weird way this project reminded me of baking: you'll find out why later on :)
The closest thing I have" to a "before" picture is this picture right here. Use your imagination to picture a regular wall... with the same burlap bulletin board... in the same exact spot.

Supplies:
Prepping the wall:
Spackle puddy & 4 inch Flexible Joint Knife
You can buy any 32 oz of Spackling puddy, but I prefer the type that is pink and dries white. I am always so eager to start the next step of the project, that sometimes I don't wait long enough for things to dry. This spackle is fool-proof, (ADHD proof, Barbra-proof) because there's no question as to when it's ready. This amount was more than enough for my wall with some left over to spare.


Application:
Wet Saw for cuts
I borrowed mine from my father.
Brick Veneer from a local mason supply place
I wanted the look of mixed brick colors. I researched different products available online at Home Depot and Lowes. All reviews led me to believe that even though online photos show products with multiple brick colors in a box, most of the real brick veneer products available on these sites arrived at reviewers homes all in one color: red. I feared my wall looking like a Pizza Hut circa 1994- so I went to my local Mason yard instead- by me this is Orange County Mason Supply in Middletown, NY. In the show room they have multiple options available. I decided to mix two different kinds: Irish Pub & Peppermill. I liked some of the darker bricks in Peppermill and the washed bricks in Irish Pub. I ended up purchasing more boxes of Irish Pub than Peppermill. (Savings note: If you have a friend who owns a landscaping business, they can often get you their discount at these type of places. I didn't know this until after I spent the $650 on bricks...it would have most likely saved me at least $65, but I count that as a huge loss because as you've heard, I'm super frugal.)
OmniGrip Maximum Strength Tile Adhesive
Since I didn't know I would be writing a blog post about this down the road, my example photo in the "steps" section below will show a different product But definitely spring for the Omnigrip product. It's what I used on my wall and had no issues. I bought a gallon and it was more than enough for 85 sq ft.
1 inch Flexible Joint Knife
I used this knife to "butter" the bricks and it was much easier than the trowel.
Notched Margin Trowel (6 inch by 2 inch)
I used this trowel to scrape the bricks, as you would if you were applying tile to a wall.


Finishing:
Sanded Grout
( In a color of your choice. I went with Alabaster, to give my wall a more "antiqued" look. I felt white would make it look too new. )
Grout Bag
(Sold not by the grout *go figure* but by the cement in the plywood aisle. Get 2 if you have a partner helping you grout like I did)
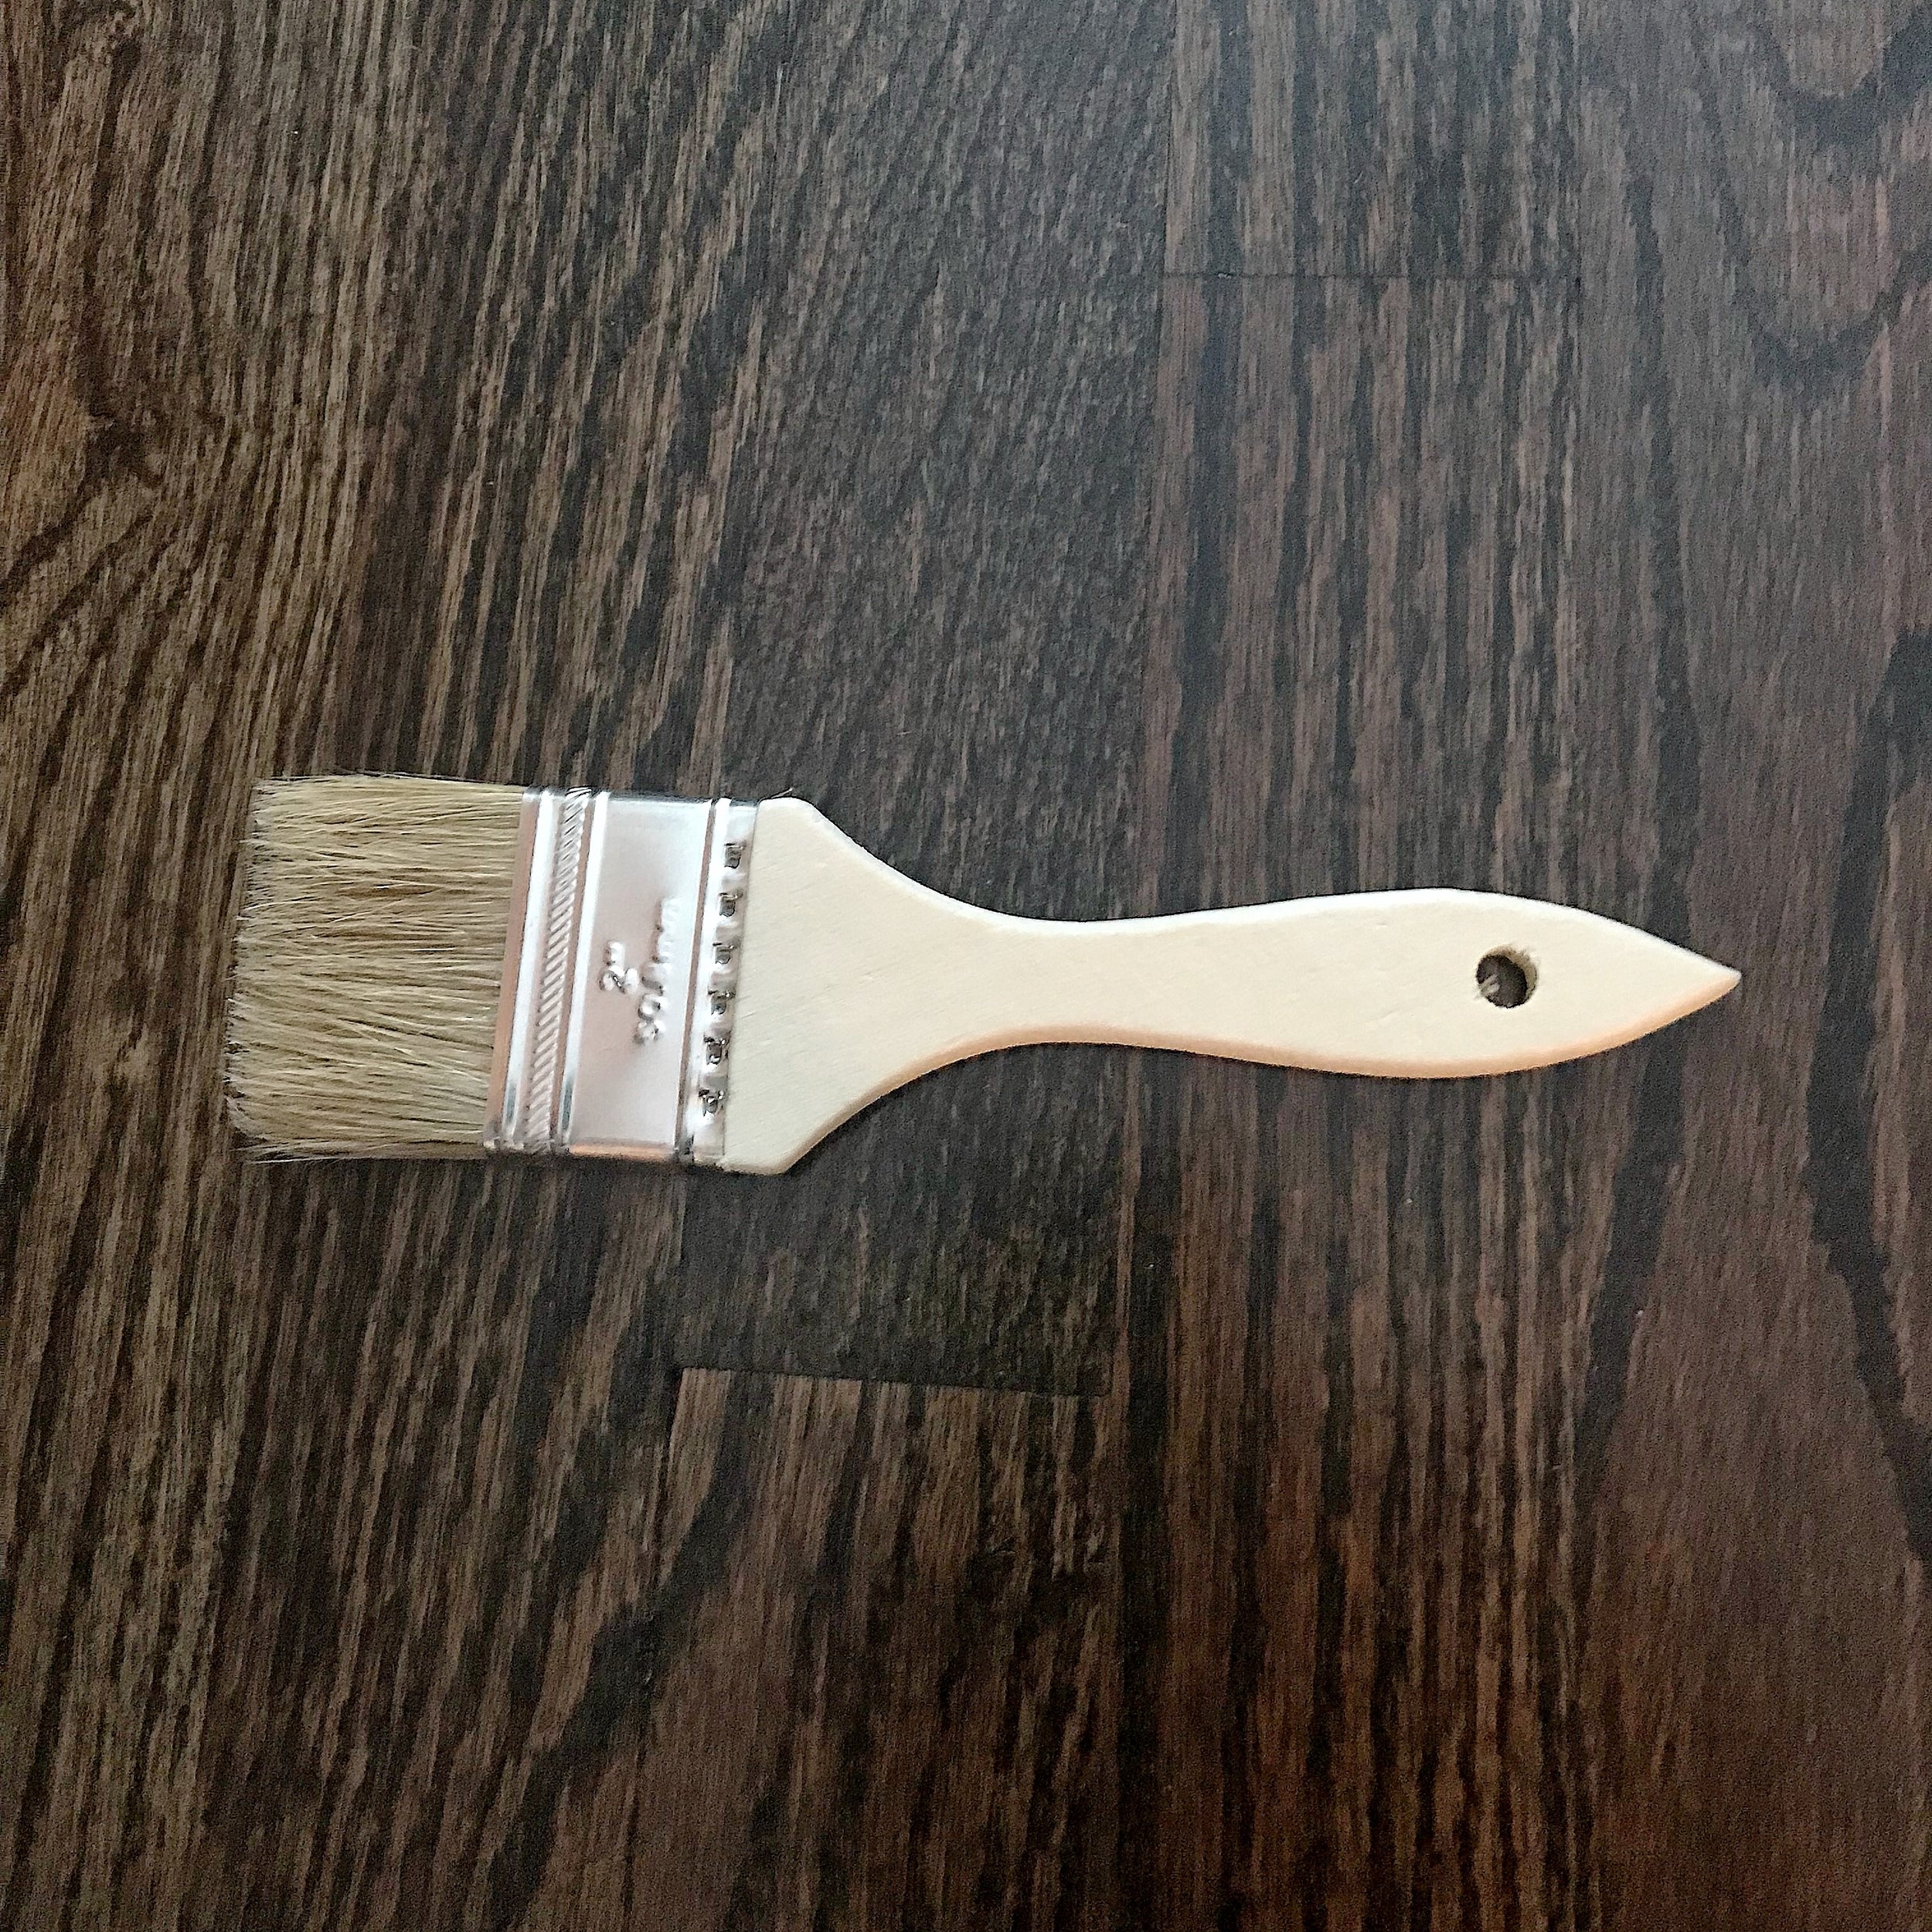
$1 chip brush (from painting supplies)
(Get 2 if you have a partner.)


Steps:
(Anytime you see the word sparkle it's mean to be spackle, autocorrect keeps wanting to change it)
Step 1: Prepare the wall for the bricks to adhere to. This involves wiping down the wall with a slightly damp rag to remove any dust, and creating a rough surface for your brick & mortar to adhere to.
I created a rough surface for my brick to adhere too by getting a 32oz tub of spackle puddy at Home Depot. Using the 4 inch flexible joint knife, I lightly applied a thin layer of spackle to the entire wall to give it a "plaster-look". You can buy any type of spackle, but I prefer the kind that starts out pink and turns white when it's dry. I'm the type of person who is way too eager and excited to get going, and it turning "white" lets me know when the wall is definitely ready for the next step.
Sidenote: I did a lot of research on whether this brick would adhere and stay on the sheetrock as it was or whether I would have to invest in durarock or something of the sort. Everything I read led me to believe that since this was brick veneer and not an actual regular size brick, it would have no problem adhering to the wall if I used the right product and there was a rough surface to adhere it to. This was the second scariest leap-of-faith I took because if I was wrong, it would not only mean the lost of $650 in brick, but the potential need to re-sheetrock this entire wall. Luckily it worked out.
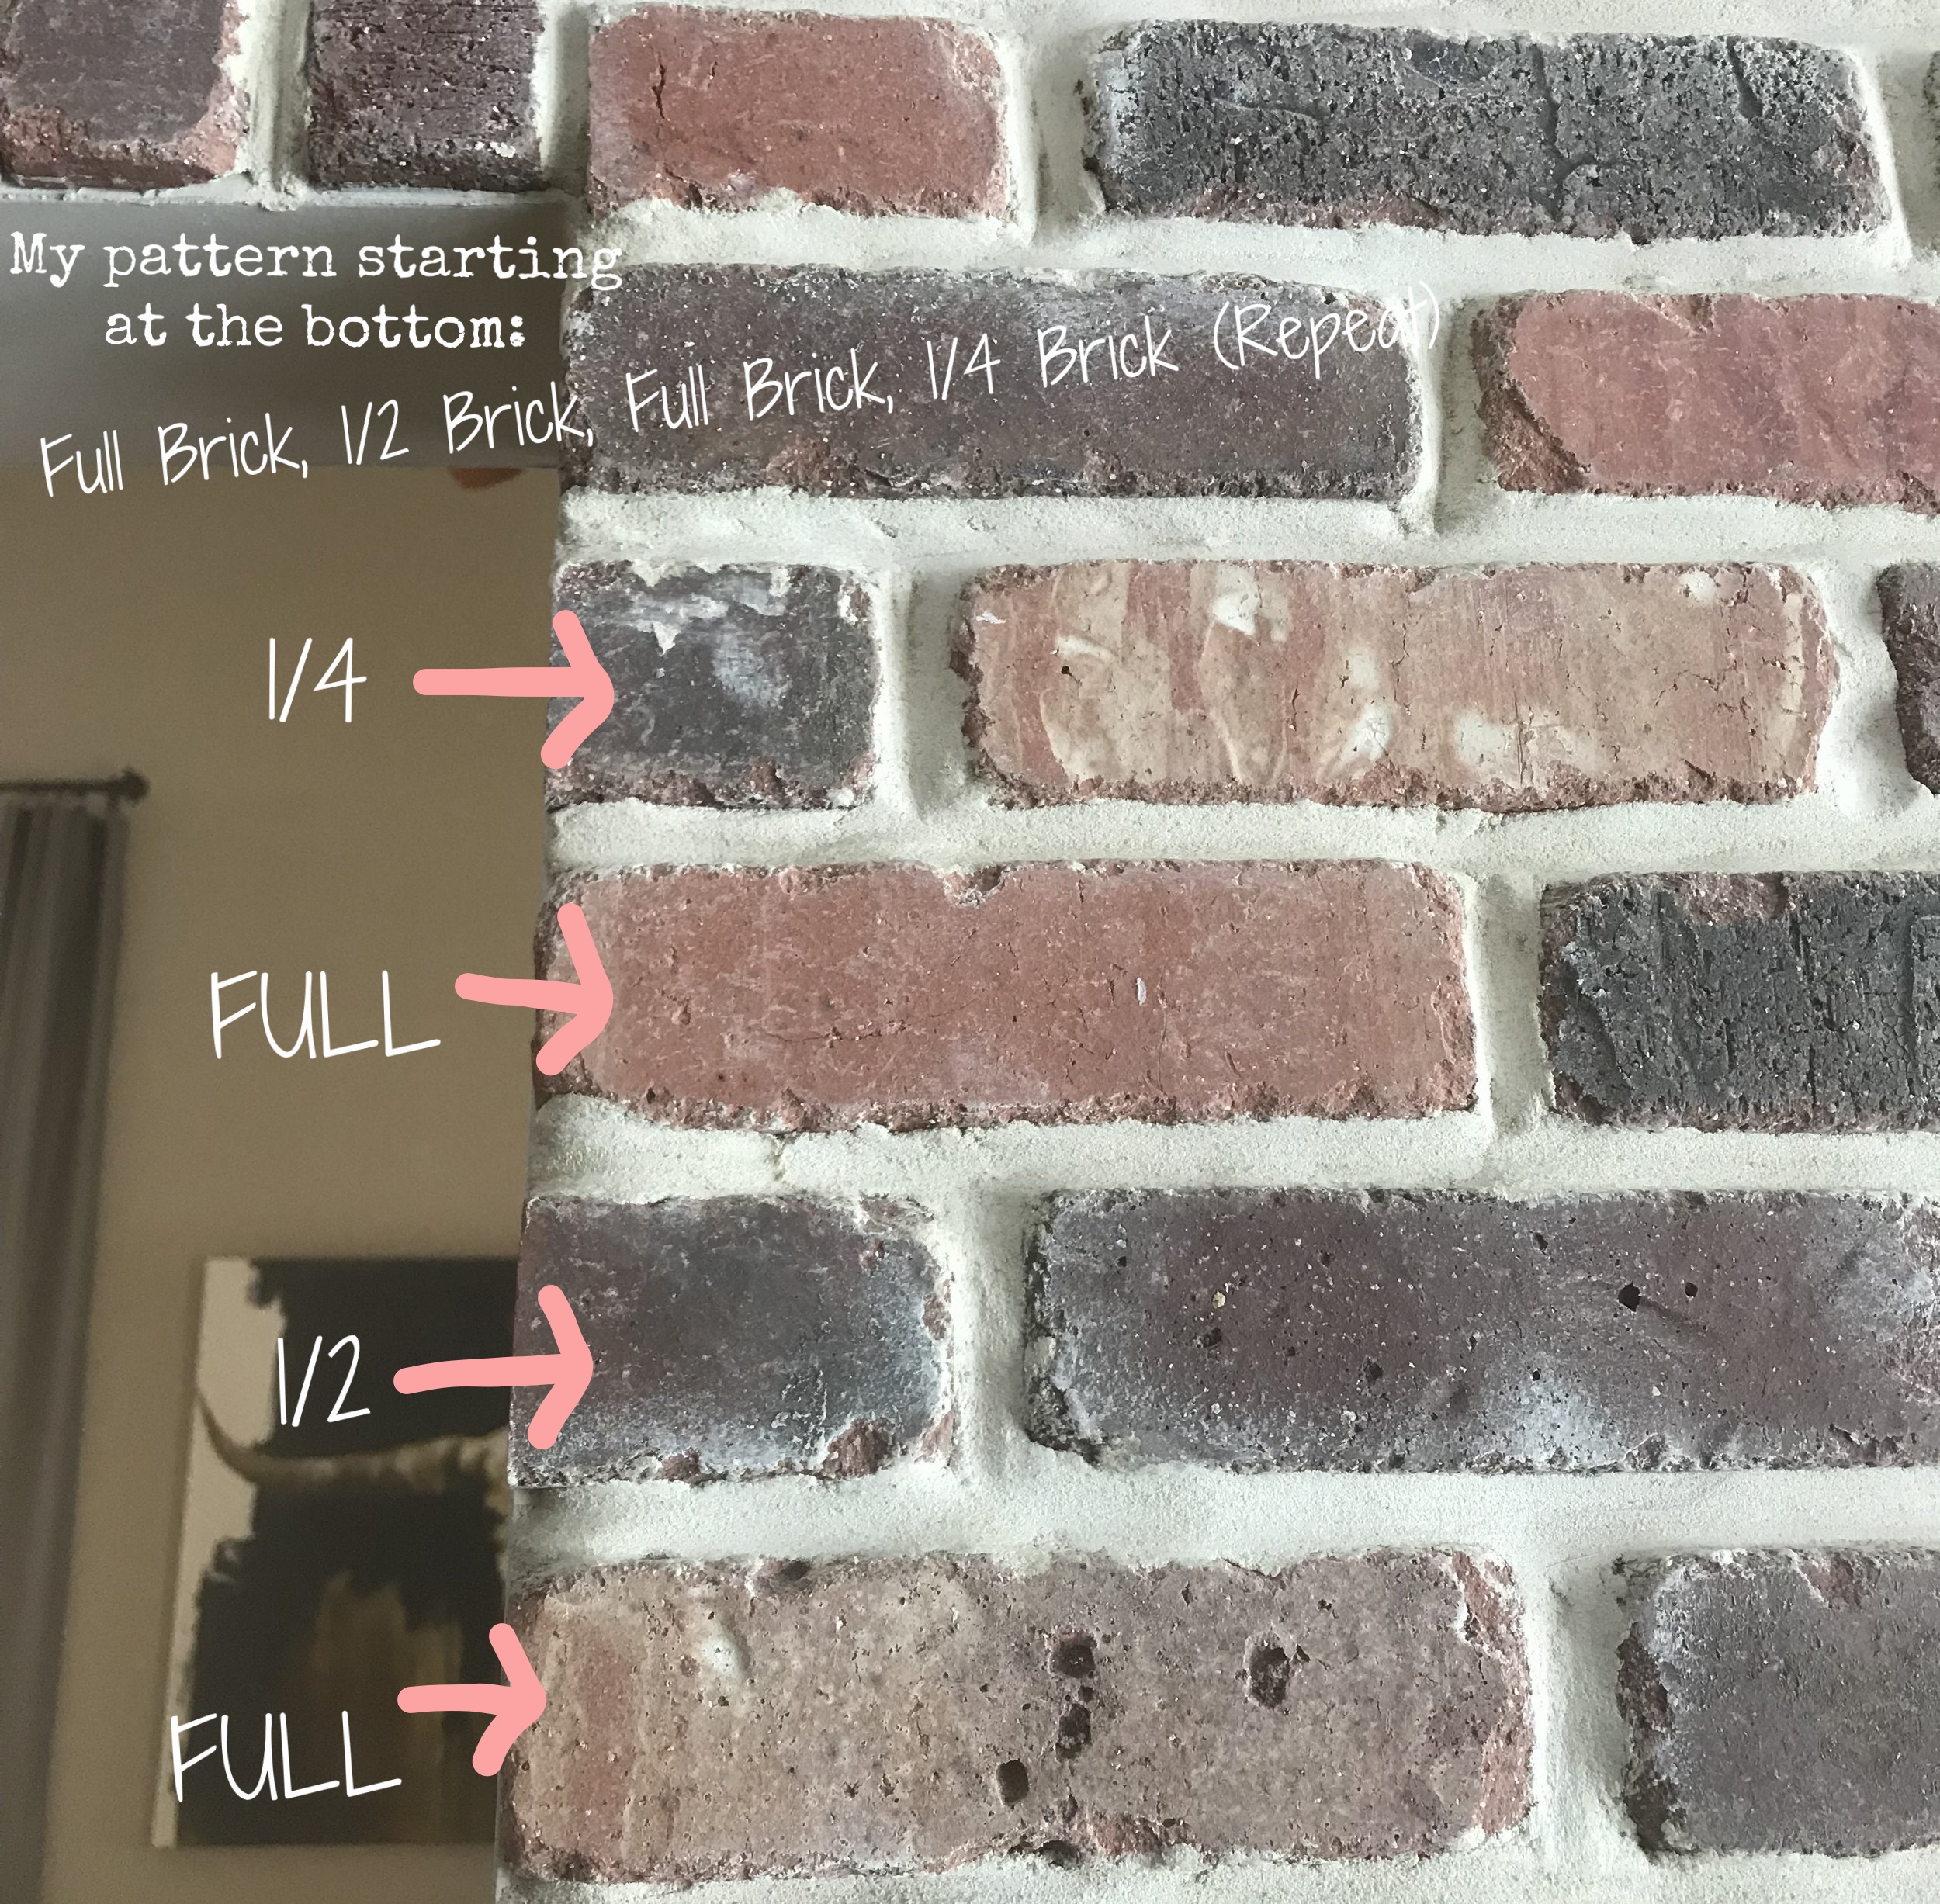
Step 2: Lay out your brick pattern while you're waiting for your spackle to dry. Have an area somewhere where you can lay out the different color bricks in a pattern to ensure that you don't have the same color bricks all around one another when you start putting them on the wall. I chose my garage floor and I made a pattern on the floor as if it were the wall inside. I alternated between both Peppermill and Irish Pub boxes. I then took row by row into the house to put up. (Time consuming, but totally worth it. Trying to pluck these bricks off this wall even 2 minutes after putting them up, proved to be difficult.)
Step 3: Draw Leveled Lines on the Wall. Once the spackle has dried, take a level and draw lines every foot or so horizontally on the wall. This is an important step because it will give you a point of reference to make sure your bricks are being adhered in a straight line, once you get to the application step. Since our wall is pretty long and our level is only 3 feet in length, we also used a chalk line, and snapped lines on the wall to make this step easier.
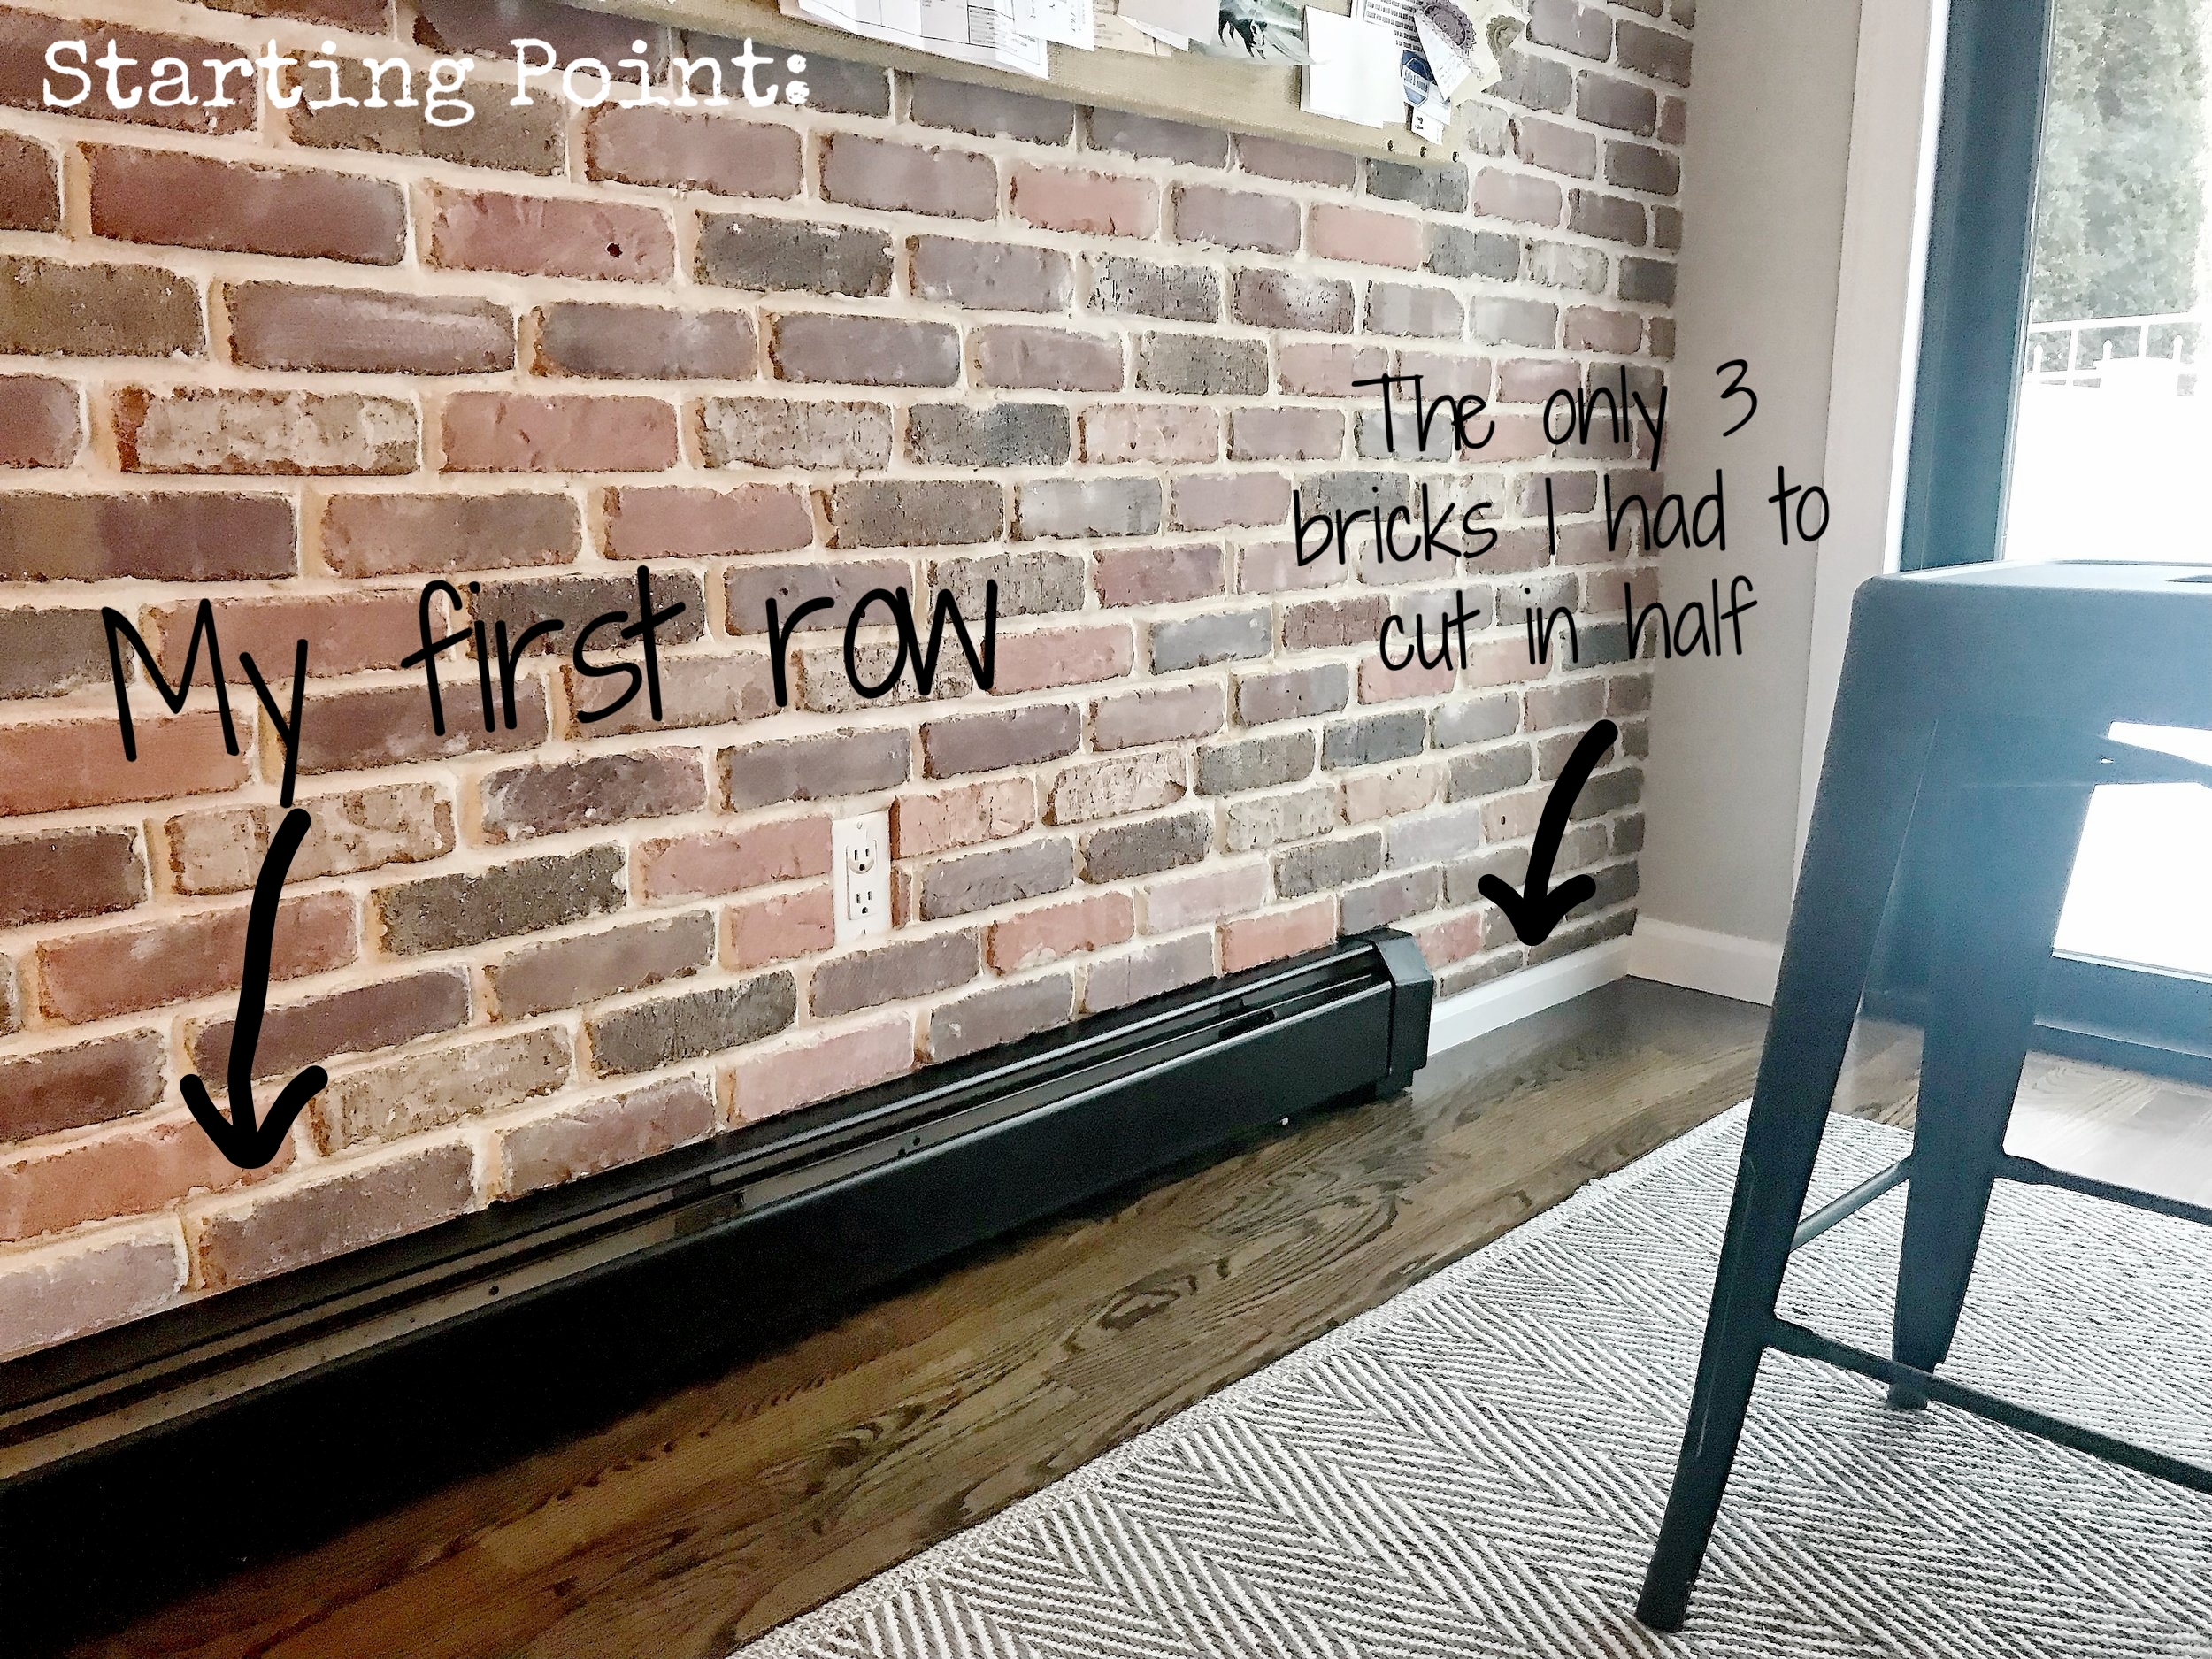
Step 4: Choose a starting point, pattern, and start buttering your bricks! Whether you should start at the top of your wall or the bottom of your wall is completely up for debate. In my case, I decided to start just above the radiator on my wall, because I didn't want to be slicing bricks in half on the last leg of the project. It worked out that I only had to cut three bricks in half for where the bricks hit the baseboard molding, and by pure luck when I got to the ceiling, my spacing worked out perfectly as well. I used the wet saw to make cuts on the bricks and it worked perfectly.
Buttering your bricks: This is where this project starts to feel like "baking". In order to "butter" your bricks, use your 1 inch flexible joint knife, grab a sizable amount of Omnigrip Adhesive, and butter your brick as if you were frosting a cupcake. Don't over-do the Omnigrip to have a "sloppy" brick, but don't under-do your brick either because then it won't stick to your wall.

Then grab your margin trowel and scrape lines horizontally across the brick and put the excess back in the Omnigrip container (you'll need it for later). Creating this trowel mark will help the brick adhere to the wall by creating space for a "suction", much like when you tile a wall.

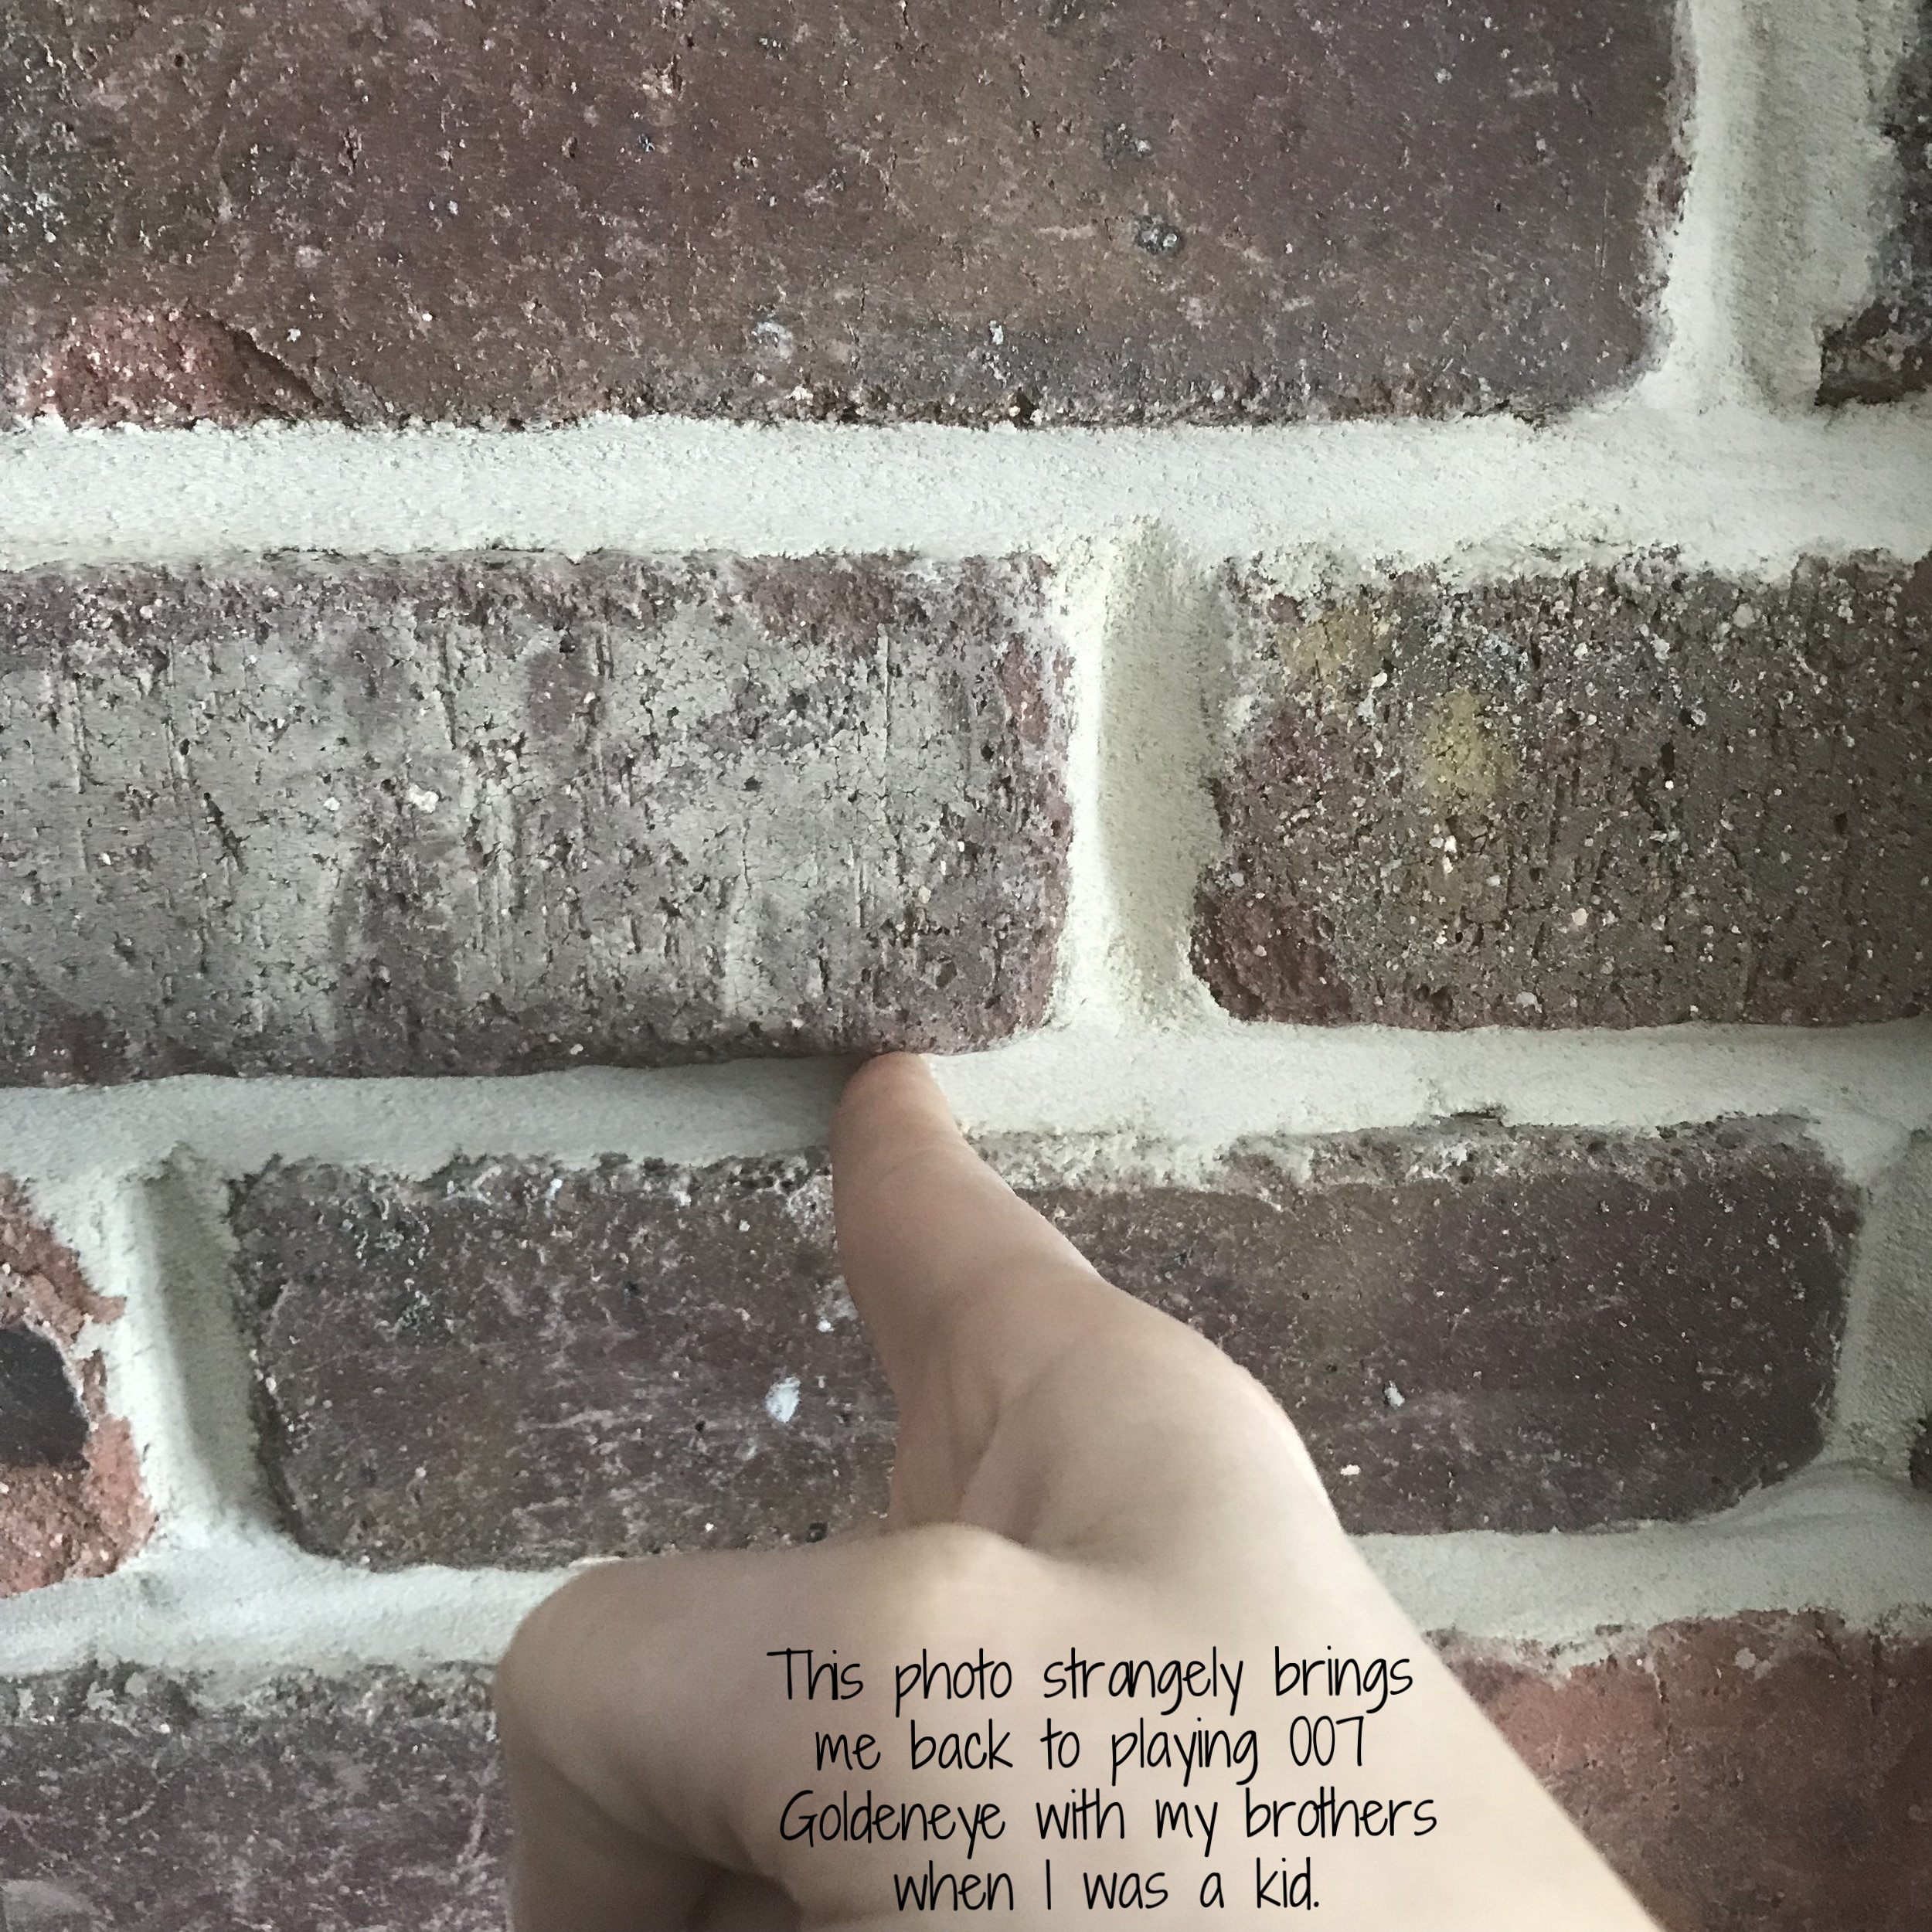
Step 5: Apply your brick to the wall. Apply a little pressure against it with your fingers and hold for up to 20 seconds. Then release. To space my bricks- I didn't use any "tile spacers". Instead, all of the bricks were spaced with my pointer finger. (I have pudgy fingers so this worked well for me. My 2nd grade teacher Mrs. Dees gave me a complex with my fingers. She was tracing my hand for a project and she said "My you have fat fingers for a little girl!".... and I never forgot it. If you have skinny fingers you might want to space them a tad farther apart : P ) For between rows I turned my pointer finger like pictured below. Between bricks I turned my pointer finger sideways. Occasionally a brick would move a little on the wall and I'd have to adjust it accordingly. Take a step back from the wall periodically and check the bricks to make sure they're not moving, Omnigrip dries pretty quickly.
When I got to the top of the door frame, I turned the bricks vertically to mirror the old-school style that masons use to do back in the day above windows and doors.
Step 6: Grout between the bricks. Make sure you wait overnight for the bricks to completely dry to the wall. Grouting between the bricks is best done by working in small sections. You'll need your grout mixed, grout bag, gloves, and chip paint brush for this part.
I wanted my wall to have a messier feel when it came to the grout so that it would look more authentic- so I used sanded grout in alabaster color (an antique beige-ish color). It definitely helps to have a partner with this part of the project. Although Shad went golfing (conveniently) two days in a row when I put up the bricks for this project- he spent the entire third day grouting with me, and it would have taken me a ton longer if I hadn't had his help.
Put a good amount of grout in the grout bag, cut off the end of the bag with scissors, and working in sections squeeze the grout out of the bag into the spaces between the bricks. You will have to use both hands for this step and it'll also remind you of icing a cake.
Using your glove-covered fingers, push the grout in between the spaces to make sure you fill in all areas. Shad and I both worked in 2 x 3 foot little sections at a time. We would go across the rows horizontally, and then fill in the small spaces between vertically.

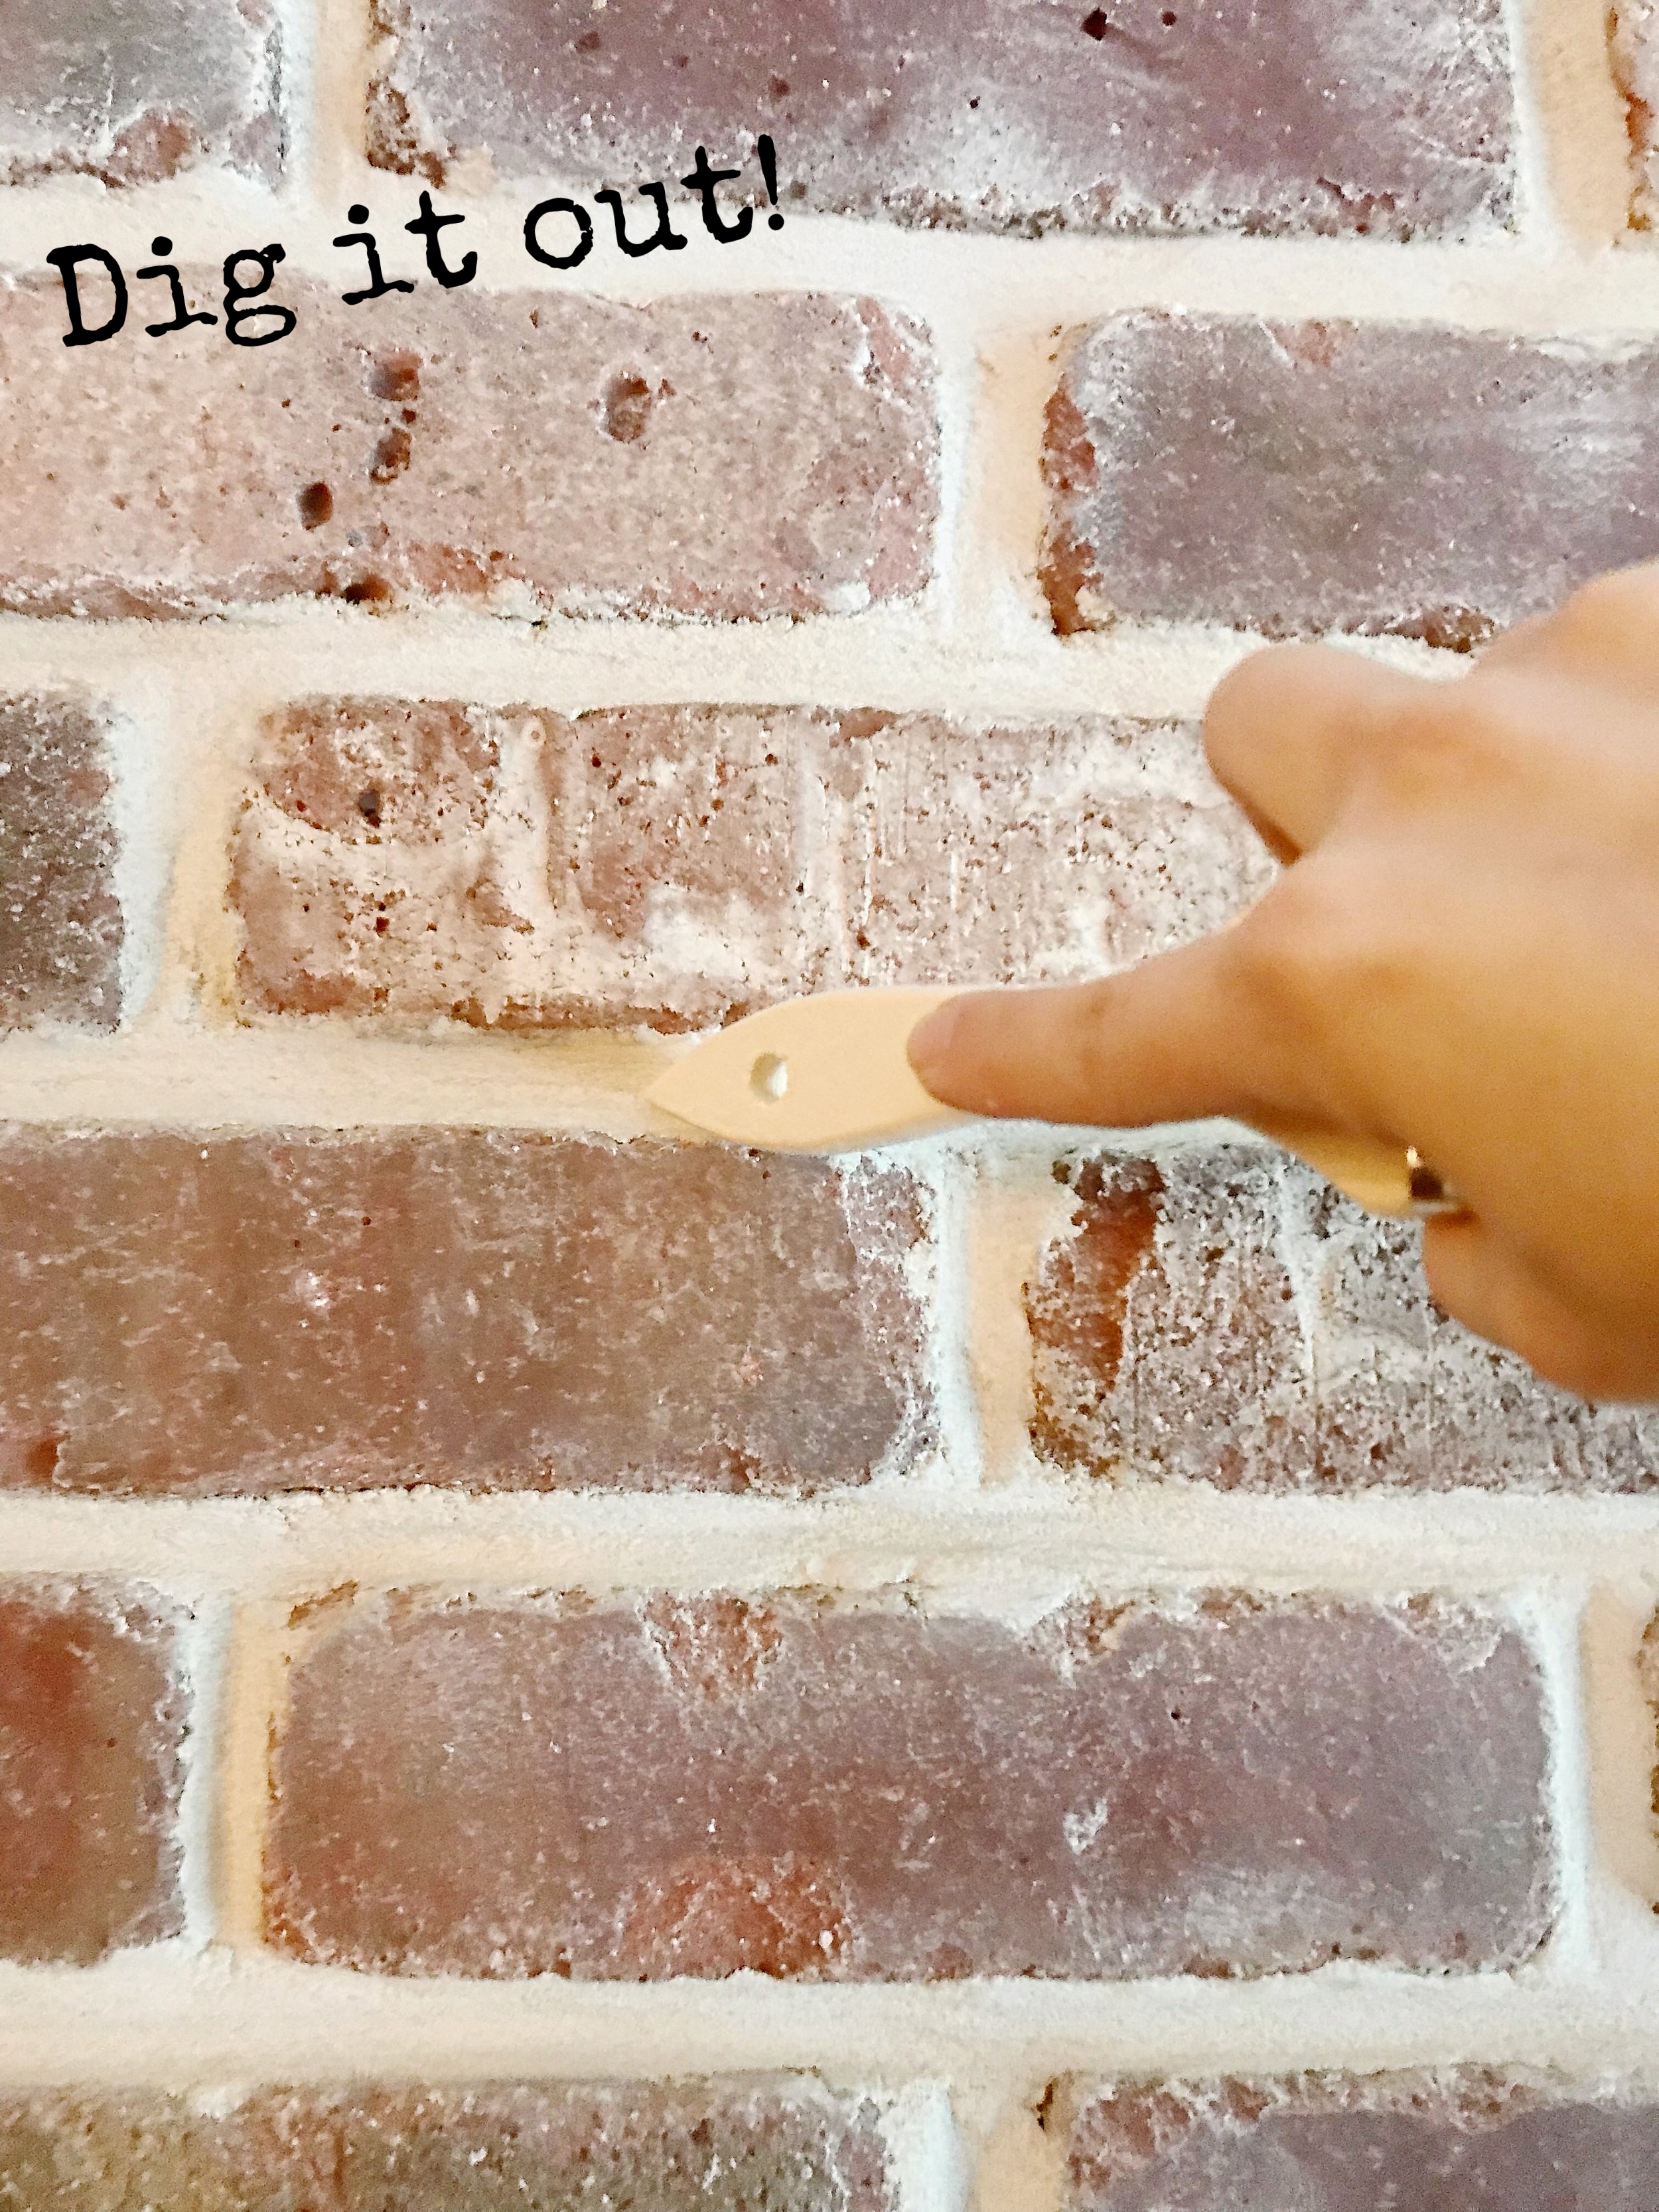
To get the look of "straighter" but messy grout lines- we would stop after working in 2x3 sections and we used the end of the $1 chip paint brush to dig out grout lines. Doing this step too soon makes a lot of the grout fall out. Doing it too late makes it super hard to dig out. (PSA: This step is super messy and a pain-in-the... it was like we had a beach in our kitchen and I was super grateful we did this prior to taking out the tile and putting down hard wood floors in here.)
Step 7: Vacuum the beach that is currently in your kitchen (or whatever room you do this in). We used drop cloths which helped greatly- and we shook them out outside when we were done. Once the grout had completely dried, I also took the shop vac and vacuumed the brick wall grout lines as well.
Tips:
1. Go through your brick boxes and put any chipped or broken bricks to the side. Most of these can be used later on in the project for the small side pieces. However- if you have a ton of broken or chipped bricks, you can always put them all in a box together and return them for another box.
2. When I got to the left side of my door frame picture below, I got sick of constantly going outside to cut one brick at a time. So about halfway through I did a "paint-by-numbers" or "cut-by-numbers" if you will, with the final pieces. I marked the bricks where they needed to be cut on the side of the brick with a black sharpie "dot". I then numbered the brick on the back and numbered the spot on the wall. I cut all of the bricks in one trip outside. This worked really well and saved me a ton of trips back and forth.

3. Finally, don't be scared! I was... and still took the huge leap of faith, and now look- people are actually asking me for advice on how to brick a wall as if I'm a mason : P
Thanks for reading. If you enjoyed my post, or if you have any questions/comments, please feel free to leave a message below!
:) Barbra
Hey Friends, I spend a lot of time putting together these posts, and I would love it if you’d show some love back and followed me on Instagram. **** 10/2020: Recently my instagram was erased and I lost all of my following, so I would SO appreciate it if you followed me by clicking on any of the pictures below from my current feed. Thank you so much!! <3