
Ideas to Coverup Your Bathtub Surround
Yea so… I don’t even know how to start this one off. How bout this pandemic? The world has literally gone mad in the 2 weeks since my last post. Scary stuff- and our great state of NY happens to be the epicenter of North America. So I’m definitely on team #stfh , and will not be venturing out…. unless I need some fresh groceries in a few weeks. And even then I have a plan… which involves an early rise, a county that’s much less inhabited than the one I reside in, and some protective gear.
As part of team #stfh, I anticipated it might come to this. The months (no joke here) and weeks leading up to our school closing, I made lists of things I could possibly do if I was stuck home for an extended period of time and made sure to get supplies for any projects I wanted to complete to stay busy and keep my mind from descending down the rabbit hole of full blown panic attacks.
We’re only 8 days into #stfh, and my lofty list is dwindling as I cross things off. Maybe I should take things slower, but the adhd in me always wants to be completing a task.
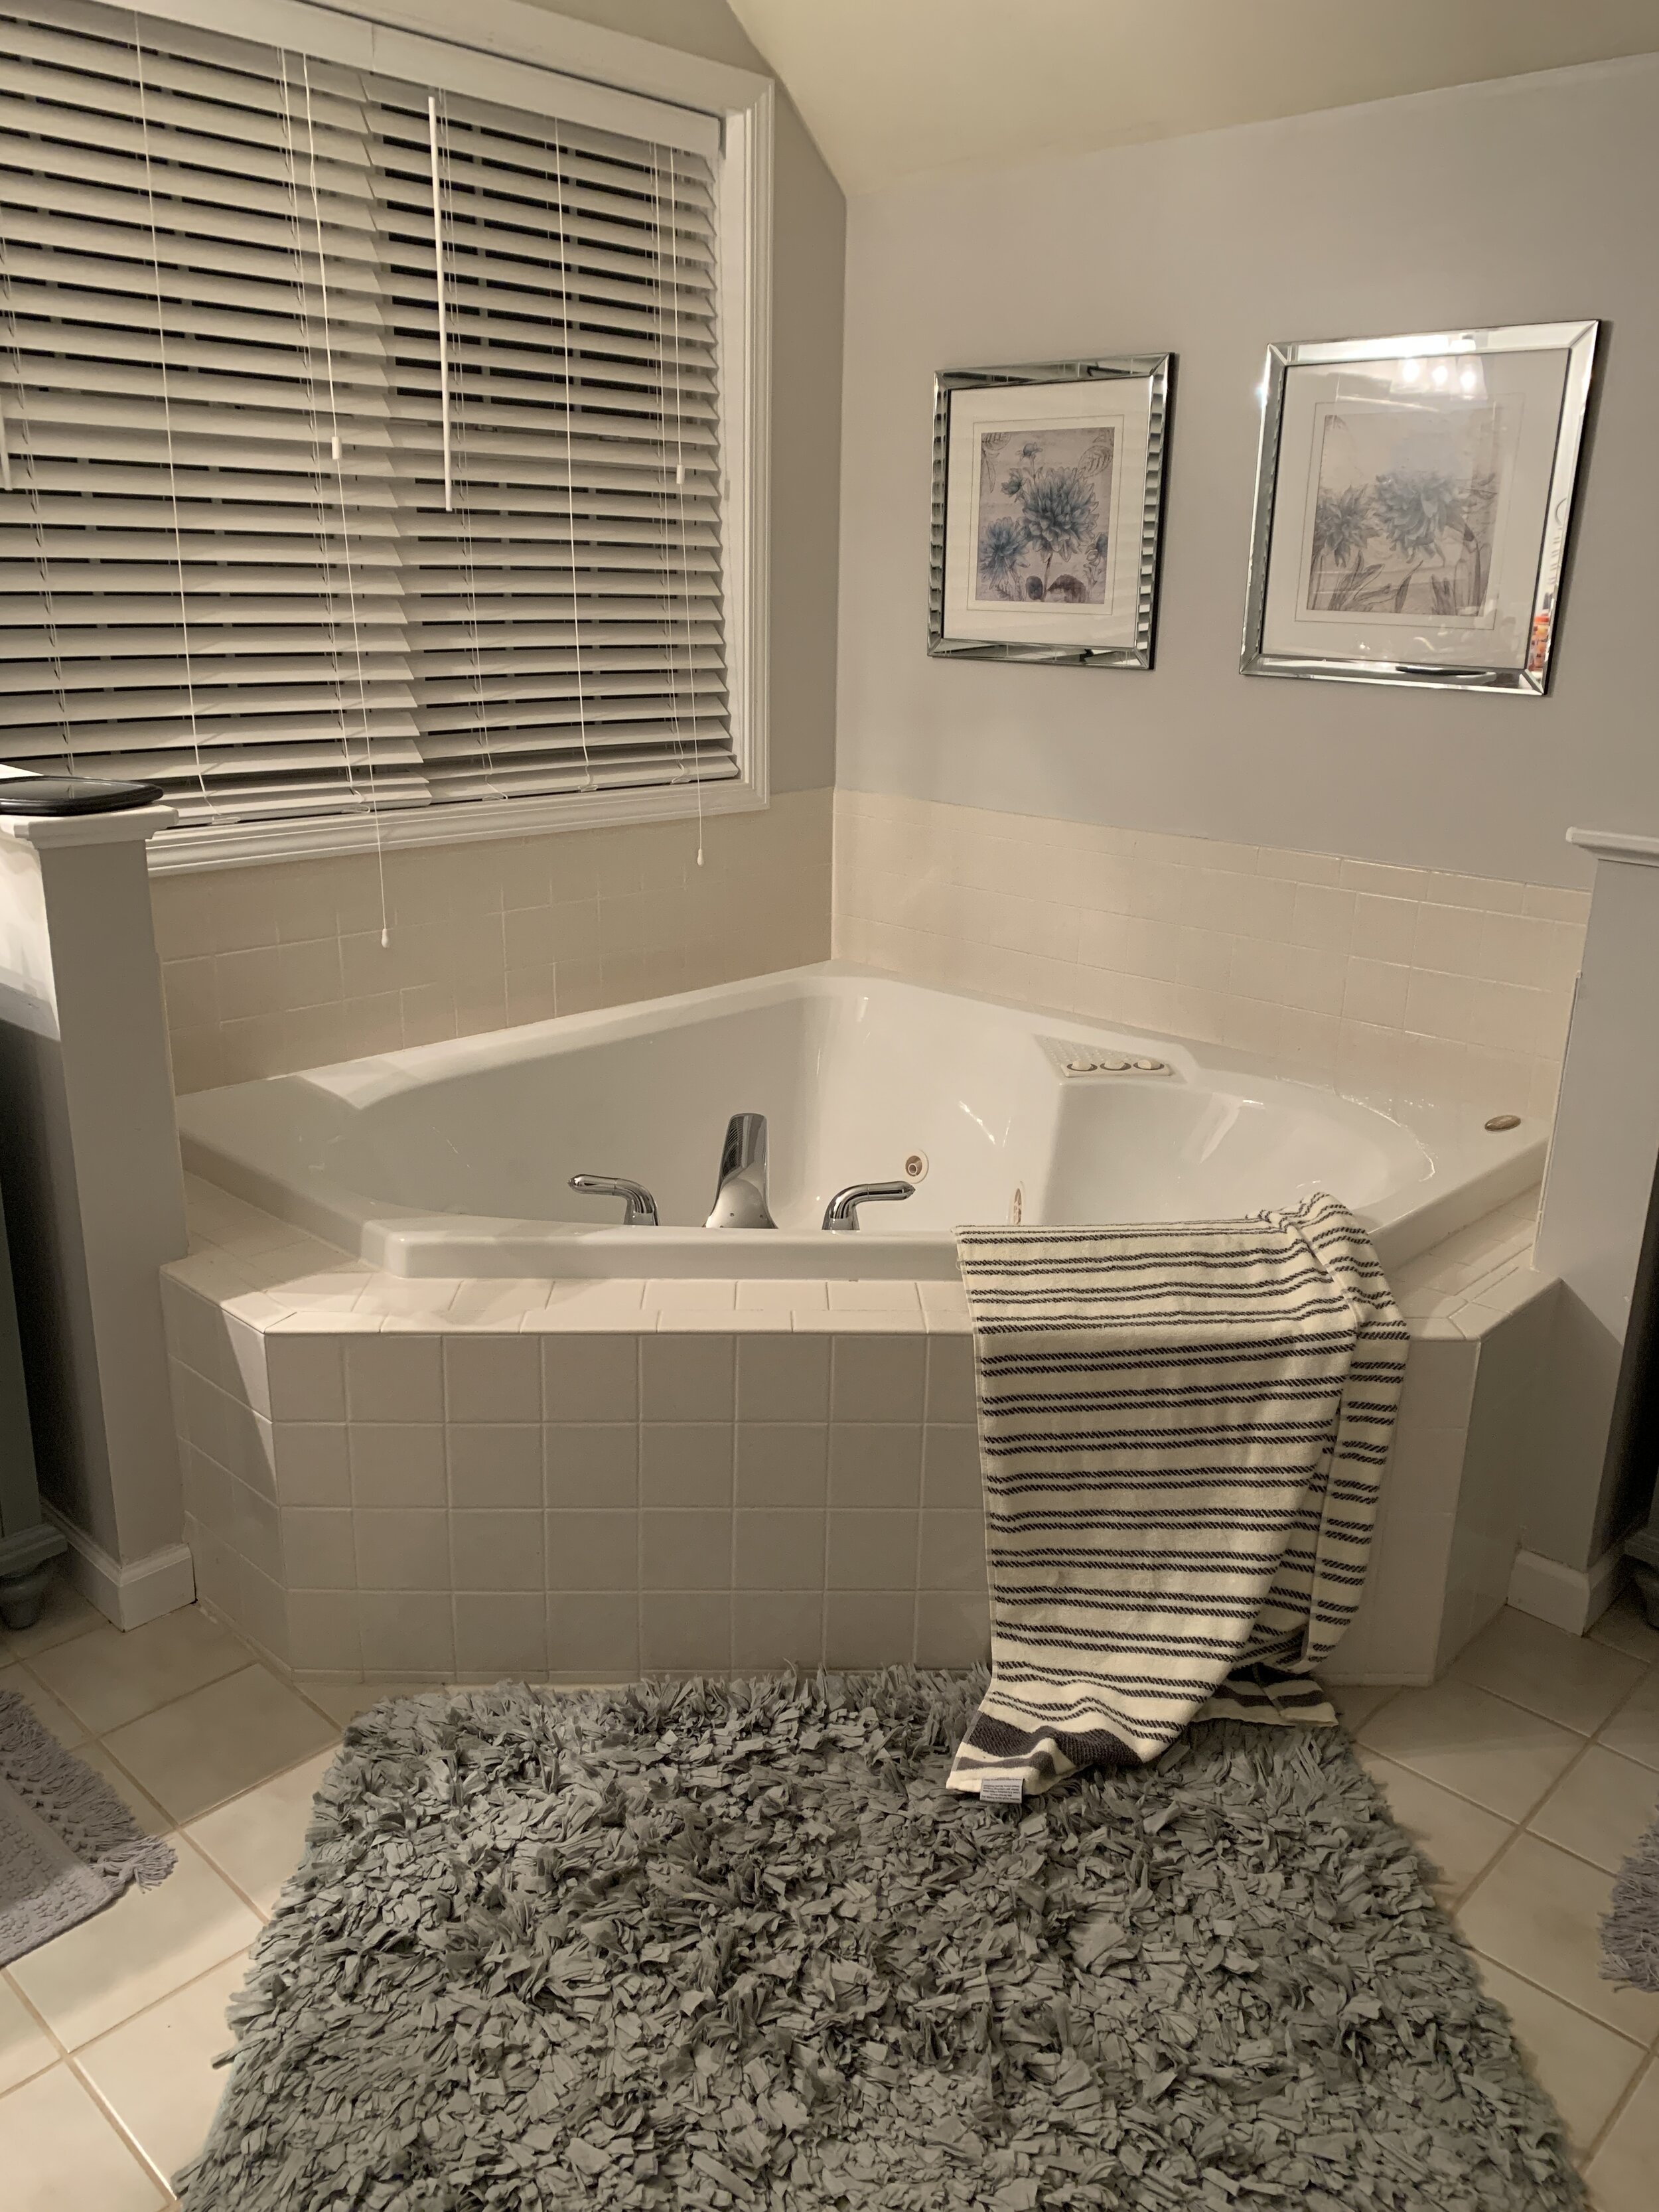
One of those items that’s been on the docket FOREVER is this awful jacuzzi tub in our master bath that I’ve deemed “Lukas & Emily’s Tub”. Why? Because after 6 years living in our home, our niece and nephew are still the only one’s that have ever bathed in it. This normally happens during “Camp Scarpulla” in the summer time. Some people dream of having a bath tub to soak in. I wish it would magically turn into a larger shower instead of a dust collector. The adhd in me can’t sit long enough in a bath tub to relax and I’m not a fan of soaking in my own filth.
Our master bath was sort of a mystery to me design wise. Originally it had three different tiles going on: tile on the floor, tile around the tub, and a tile border (instead of base moulding) at the base of the wall around. It blew my mind that the owners before us had bought this home for top dollar and the finishes in it were “spec-house” at best.
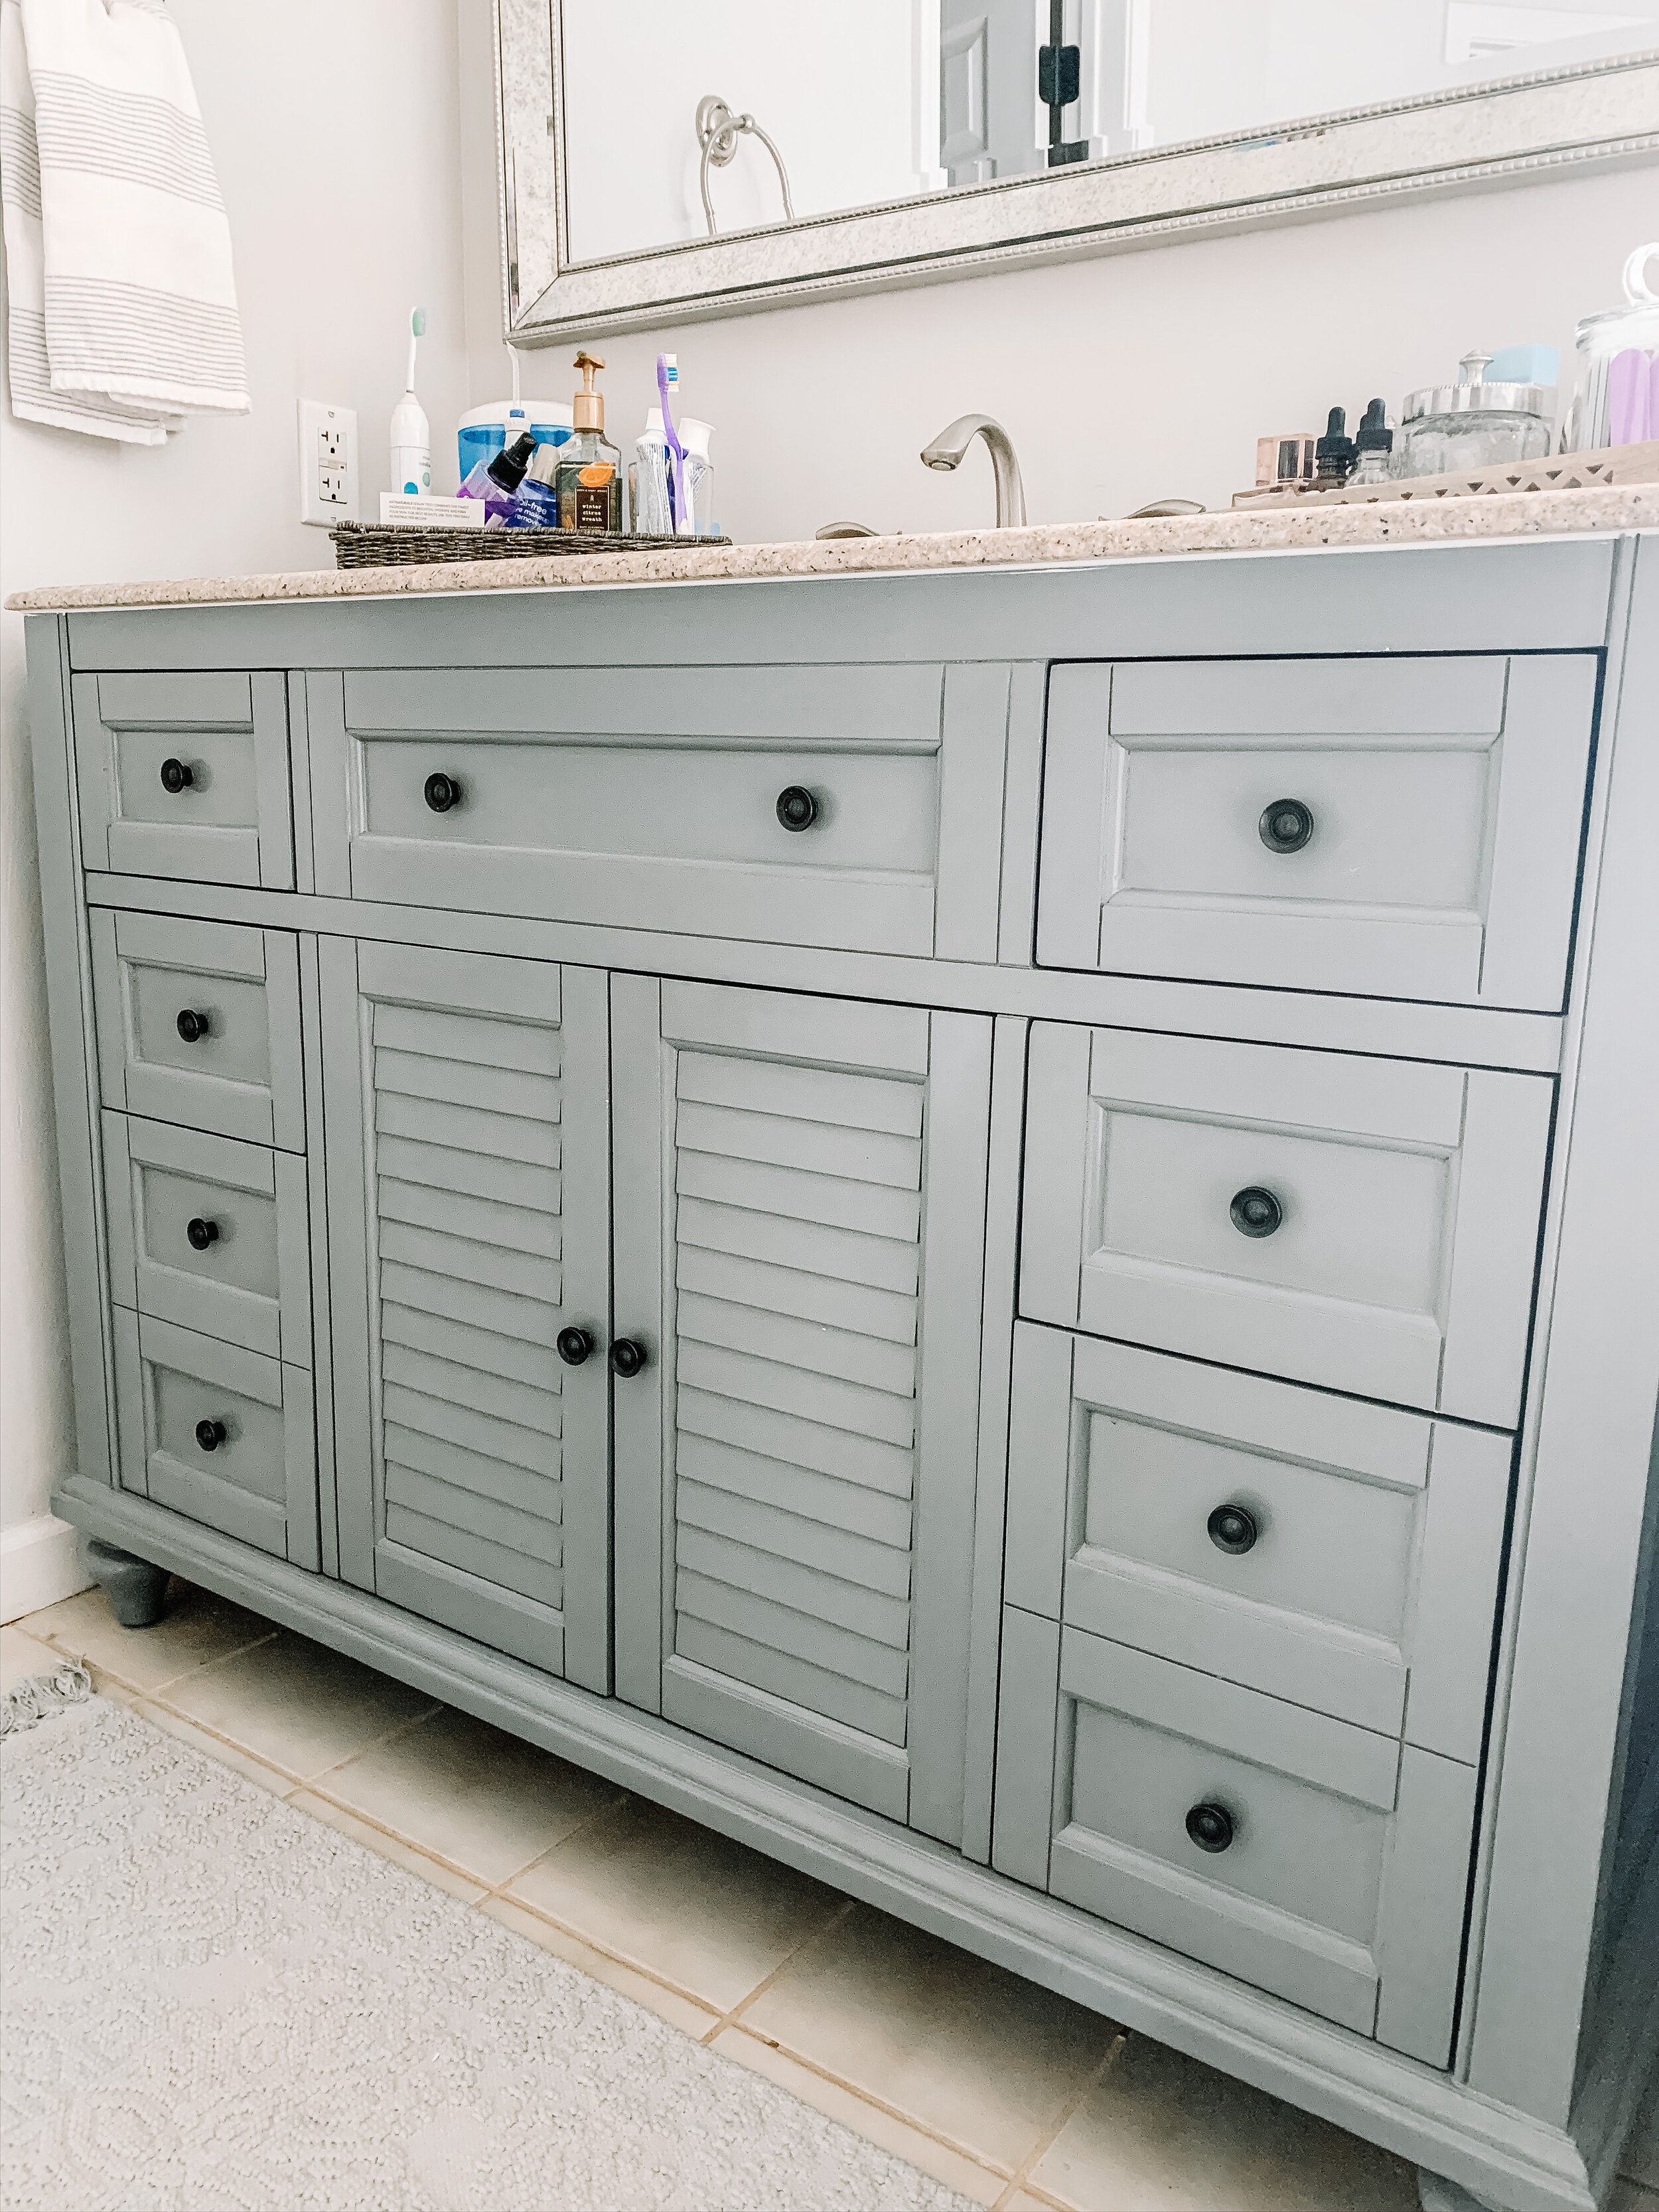
Step one upon moving in included ripping the tile base around the wall, replacing it with base moulding (or molding?) instead, and replacing the cheap vanities.


Then I had lofty dreams of redoing this bathroom completely down the road, ripping out the tub and moving our shower to where the tub is currently to create a huge walk-in shower. That was until I started working for a kitchen & bath guy and discovered what it truly costs to renovate a master bath. That’s money I’d much rather spend else where, and given the current state of things in our country, I’ll leave that in my rainy-day fund.
So my compromise to not having to stare at the plain and boring tile around this tub was to create a tub-skirt much like I’d seen in tutorials around the internet:
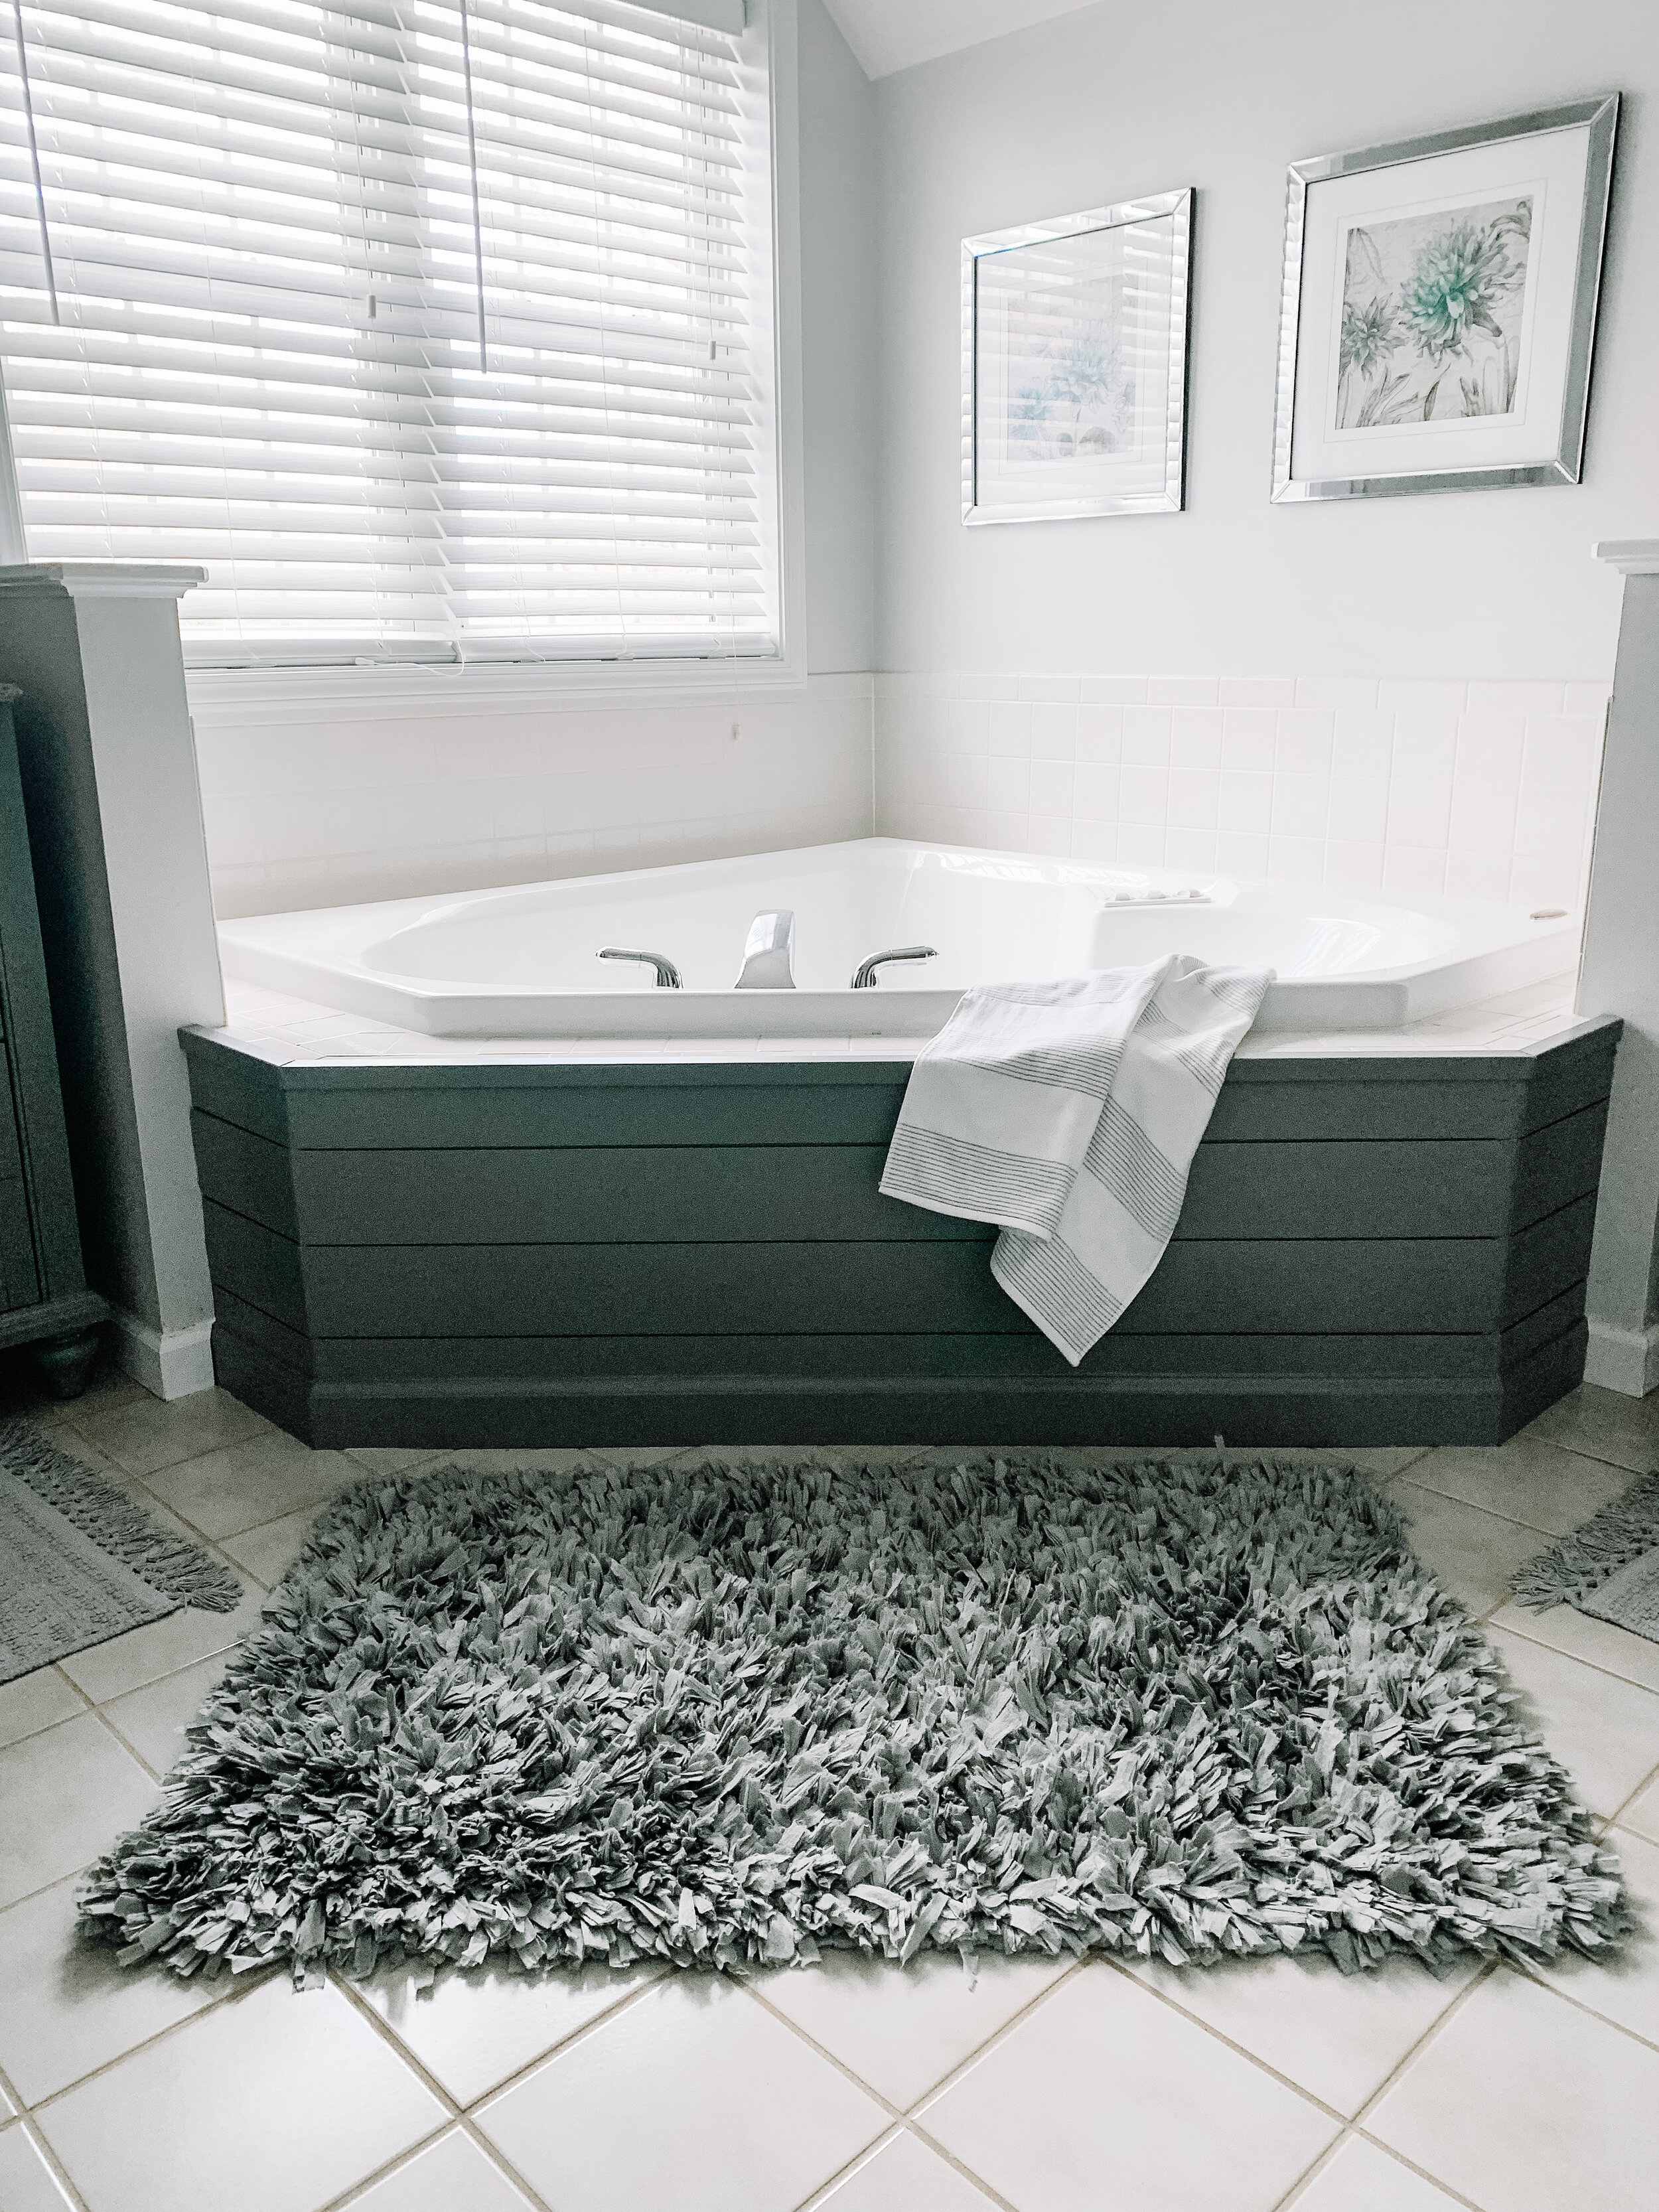
I went with shiplap for 2 reasons: 1) because it’s cheap (I only needed 4 pieces at $5.48 each), and 2) because it reminded me of the center doors on our vanity.
Total Cost: Less than $50 and I’m pretty happy with how it turned out.
Supplies:
(Yours will differ depending on the size of your tub or what type of skirting you decide to go with)
4 Pieces of 8’ Tongue and Groove Preprimed Shiplap
1 piece of 8” Base Molding
1 piece of 1-1/8 in. x 1-1/8 in. x 8 ft. PVC Outside Corner Molding (I used PVC because this was the part that might get splashed with water)
A tube of Liquid Nails Construction Adhesive
A tube DAP Alex Flex 360' Caulk
A tube of GE Silicone Caulk
16 Gauge 1 1/2 Nails for the Nail Gun
1 Quart of Paint to match my existing vanities + Paint brush (I brought the drawer front with me to color match), Note: You can do it just in white, my preference would be Decorator’s White by Benjamin Moore, but I didn’t want three different tones going on by the tub; beige flooring and lighter beige tub tile.
**Click on the pictures to be brought directly to the products on home depot.com’s website **


Tools:
For cuts I used a Table Saw and Miter Chop Saw
Installation I used: Caulk Gun with Liquid Nails + Porter Cable Air Compressor + 16 Gauge Nail Gun (which I literally got the combo kit on sale for $99, wait for it to go on sale)
And a Digital Protractor to determine the angles I had to cut.


Note: This guy’s Youtube video was great at explaining how to cut angles outside of 45 degrees with your miter saw. ( I can cut a 45 degree angle all day long, but once you start messing with angles greater than 90 degrees I’m all confused. Wish I was a math teacher, lol.)
How I put it all together:
I made all my cuts first after measuring and determining the lengths and angles using my digital protractor. For my tub, the shorter pieces would meet with the longer pieces to make a 130 degree angle, so I cut my pieces at 65 degrees.
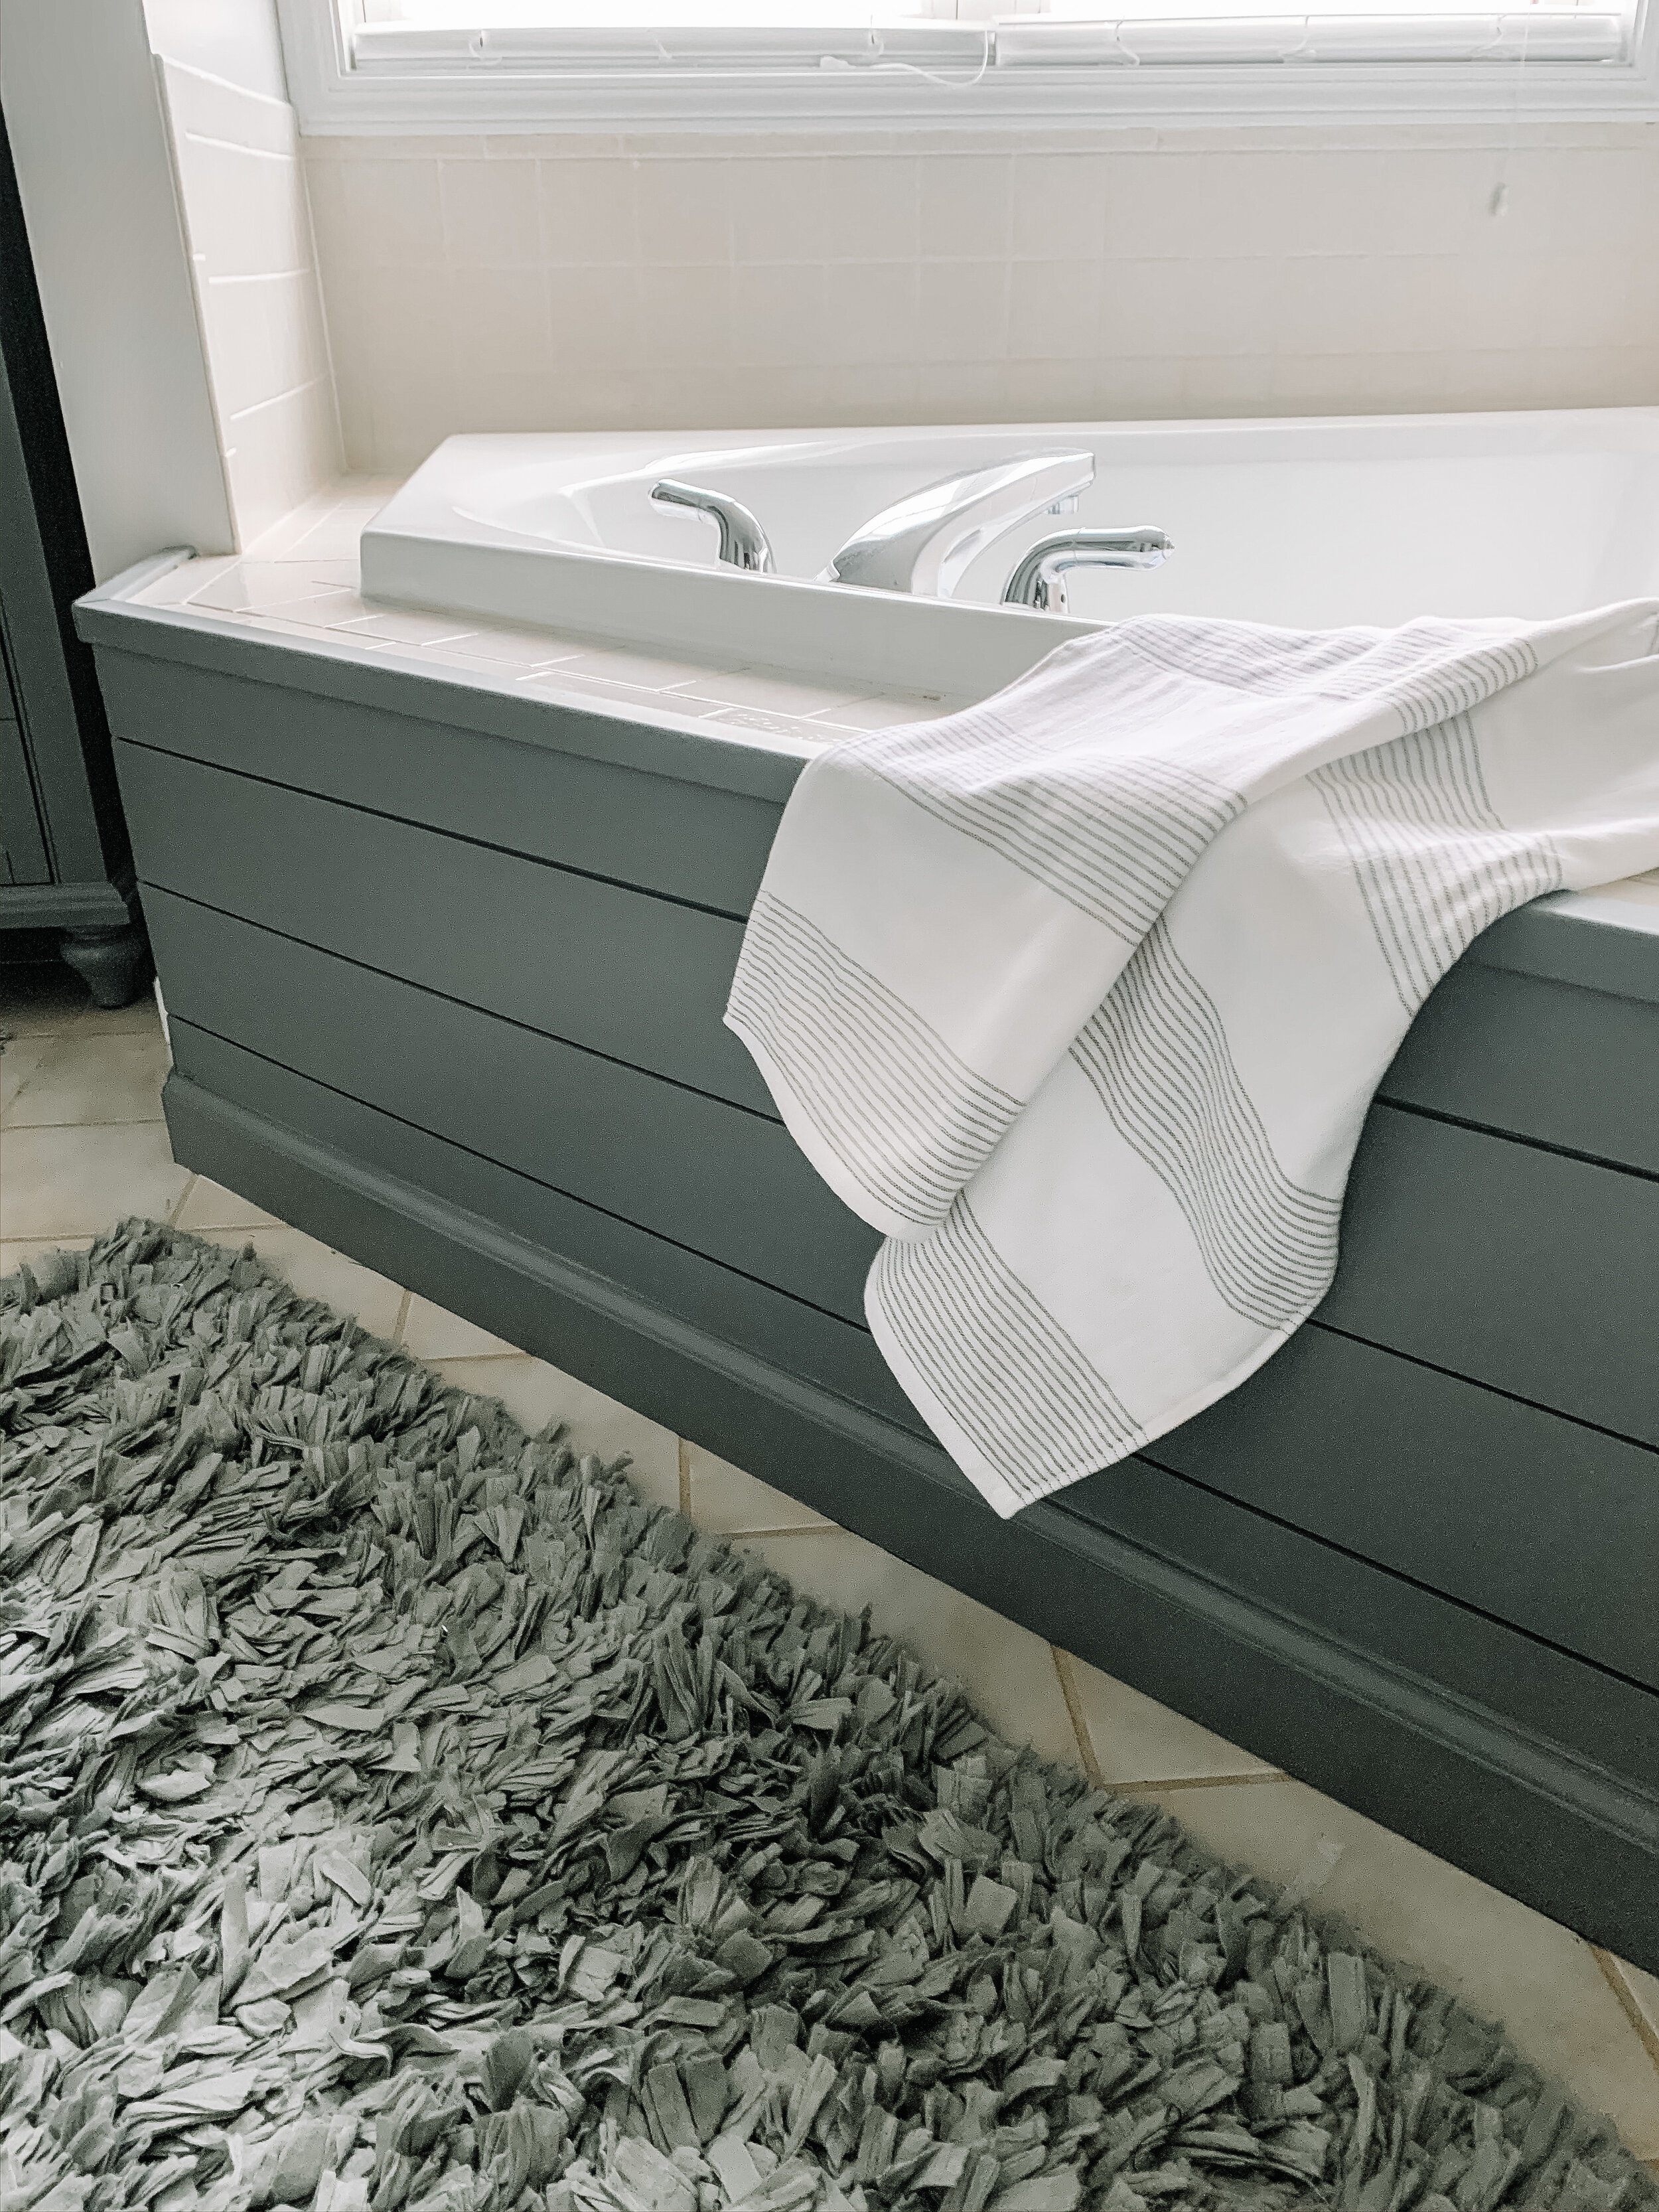
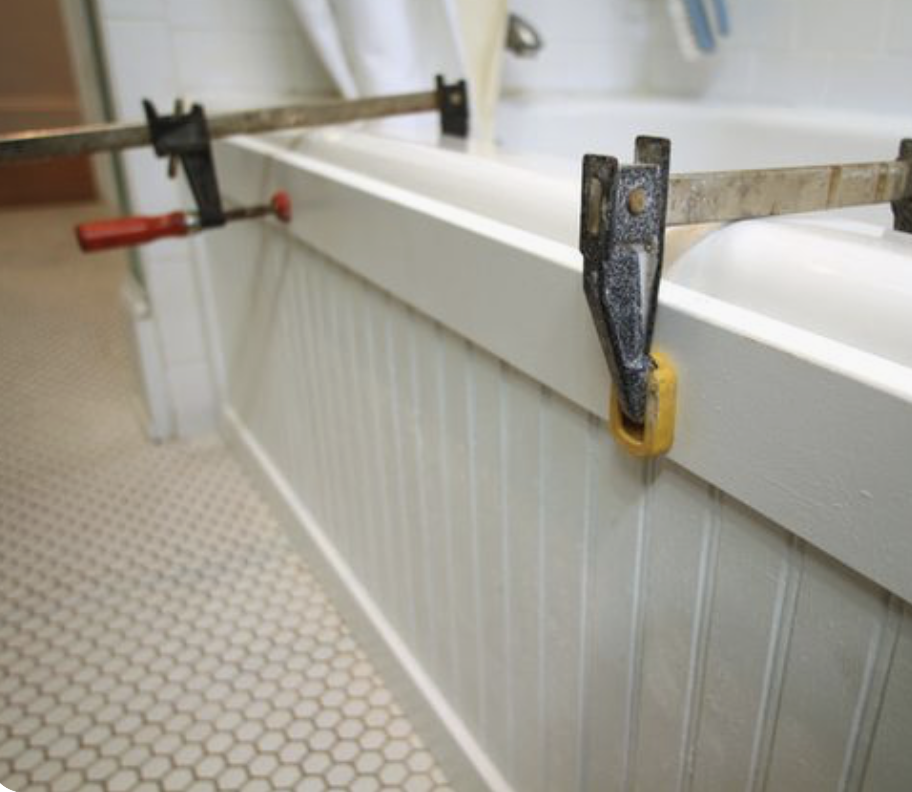
The key to getting this to adhere to your tub is to use liquid nails. In my case, I had a small wall of tile between the tub surround and the actual tub so I was able to put 4 nails down each board on the long runs in between grout lines, in addition to the liquid nails which I used a caulk gun to apply the liquid nails prior to application. Most people I’ve seen use large clamps to adhere the boards to the tub sides, which is fine too.
Once I adhered the shiplap boards to the tub, I then covered the nail holes with spackling paste and sanded them after it dried until they were smooth.
Next I cut my base trim at the same angles mentioned above, once again applied liquid nails, and nailed it into my bottom shiplap.
Next I ran the top shiplap boards down my table saw to cut off the excess that came above the tub surround wall.
I cut my outside corner pvc and instead of nailing it in, I only used liquid nails to adhere it to the top corner of the shiplap, and put weights on top of it until it dried.
Finally once everything was dry, I first caulked the shiplap boards ends and base molding with the DAP white caulk, followed by the outside corner with the clear silicone bath caulk.
Paint & you’re done.
*** If you’d like to see a quick video clip of me putting it up on my tub surround, follow my instagram account below, and click on “Blog Posts” in my saved stories.***

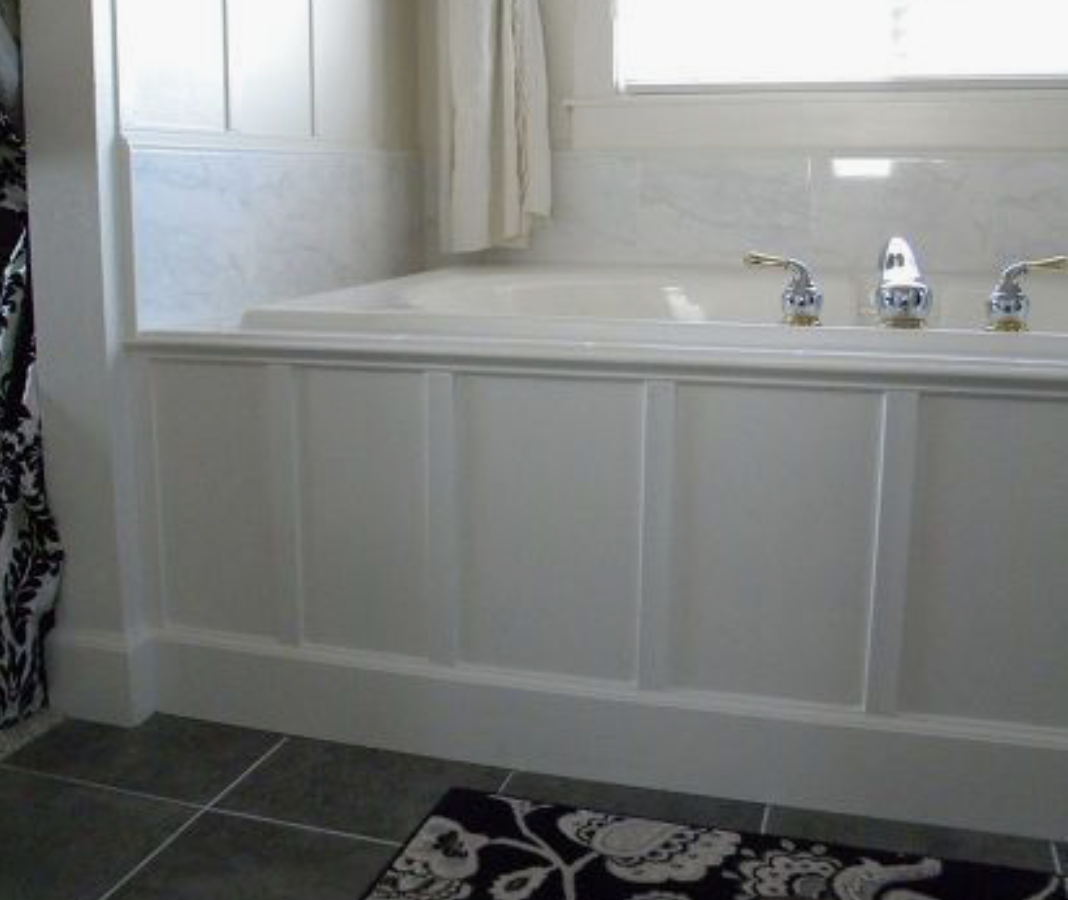
My Final Results:


Other Ideas for Tub Surrounds from the Internet:
*Click on the pictures to be brought to the direct websites*

And as always, thanks for stopping by, reading, and supporting me! Have any ideas of what you’d like to see on my blog? Feel free to comment below or share with a friend!
<3 Barbra
If you enjoyed this post, you might also enjoy my other posts:
Hey Friends, I spend a lot of time putting together these posts, and I would love it if you’d show some love back and followed me on Instagram. **** 10/2020: Recently my instagram was erased and I lost all of my following, so I would SO appreciate it if you followed me by clicking on any of the pictures below from my current feed. Thank you so much!! <3