
How to Decorate a Fireplace Mantel
Happy New Year Everyone!
So now that all the Christmas "crap" is away and we're on to 2018, what better way to start the new year than with some home decorating projects?
I have a ton of projects on my list for this year that I would have loved to bang out over winter break- but most of these projects involve using a miter and table saw, and it's just too damn cold to go outside. Instead- I'm focusing on the inside after putting away all of our Christmas decor.
I love the cozy-ness of Christmas decor and of the stockings hanging over our fireplace during the month of December, but there's no better feeling to me than when our Christmas stuff is packed away and we can start fresh for the new year.
This is the first time we've ever put away our Christmas stuff this early after Christmas- we usually wait until at least the first weekend in January (which is longer than I want to wait), but this year I felt like I got the "ok" to take it down after seeing a friend's post on Facebook about taking her Christmas decor down before the New Year started (Thanks Jackie!) . Shad says the house feels empty, but I couldn't disagree more. To me it feels so much cleaner and I was so excited for the more simple look of my fireplace mantel with my "normal decor".

A great (and easy) indoor project is re-decorating your mantel after taking down holiday decor. Creating a balanced look for your mantel can sometimes feel overwhelming- so I laid out a formula that anyone can follow, even if your style doesn't match mine.
My fireplace mantel decor formula is:
An "anchor", "weights", "layer decor" & "filler"

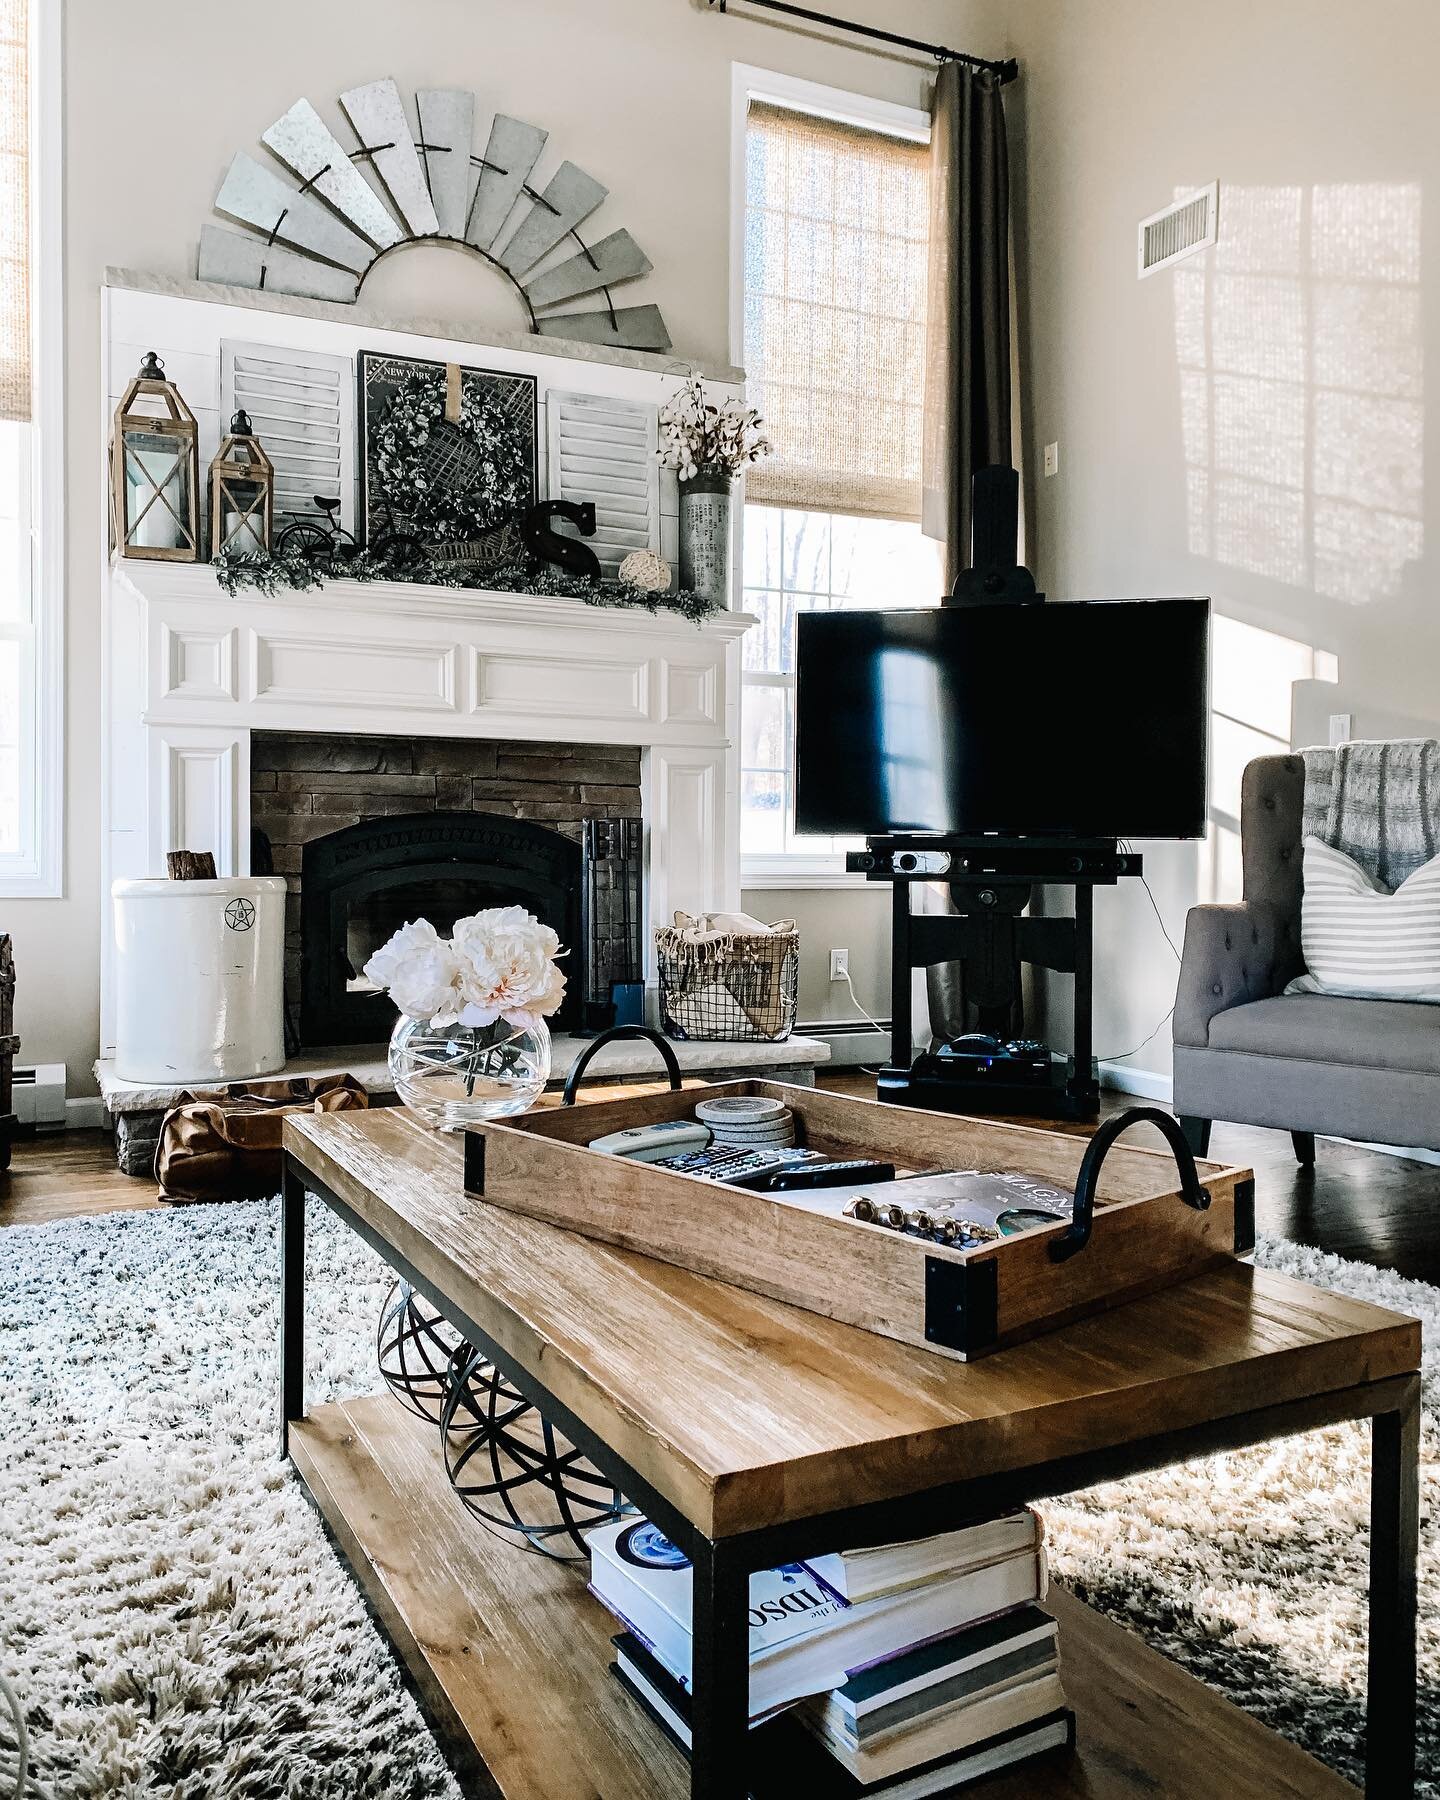
1. Start with an "Anchor"
Your anchor is the focal point and center of your mantel. It should be the largest decor piece on your mantel. In my example it would be my “New York” canvas map. Examples of anchors are below. Want to jazz up the anchor? Try adding a wreath to hang over. I change out my wreath for each season. This wreath I recently got on clearance at HomeGoods for $8. I feel like it's a great winter wreath that's not "Christmas-y" but not too "spring-ish" either.
2. Add "Weights" to each side
Weights are what go on either end of your mantle and anchor to balance it out. They should in most cases be taller than the filler and layer essentials. In my example the lanterns and the vase with cotton stems are my weights.
3. Add Layer Decor
Layer decor will overlap your anchor on each side of the center of the anchor to created a "layered" look. In my case my shutters, S, and metal bicycle would be considered my layer decor. Additional examples of layer decor can be found below.
4. Lastly add some "filler"
Filler are little decor pieces that are appealing to the eye and do exactly that- "fill" the space between everything. Try adding greenery garland and change it out for the different seasons. We are in between winter and spring in my example- so I don't have any pictured. It's too early to put up my "spring" greenery, but I didn't want to keep up my holiday/winter greenery either.
Here are some examples and ideas:

No matter your style, you can still create a beautifully decorated fireplace mantel by following this simple formula. I hope this post has inspired you to spruce up your mantel as one of your "home decor resolutions" of 2018. Happy New Year and thank you for taking the time to read this!
If you found this post useful please share it with a friend. And if have any questions or comments, please feel free to to comment below. <3
- Barbra
Hey Friends, I spend a lot of time putting together these posts, and I would love it if you’d show some love back and followed me on Instagram. **** 10/2020: Recently my instagram was erased and I lost all of my following, so I would SO appreciate it if you followed me by clicking on any of the pictures below from my current feed. Thank you so much!! <3